ScaleRail - Placing a Zero Degree Switch to Overcome the Node Problem
by Yuri Sos

Overview

Scalerail is a system of enhanced track shapes and textures for route-building in MSTS. It is available as a public beta currently at version 1.7.

In an effort to get around an MSTS bug where a great distance between points (switches for US readers) causing erratic train handling and coupler breakage, zero degree nodes have been developed by Marc Nelson of Scalerail.

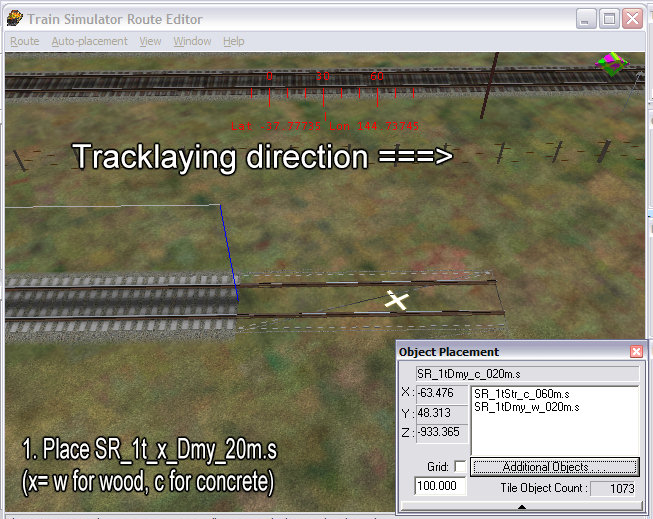
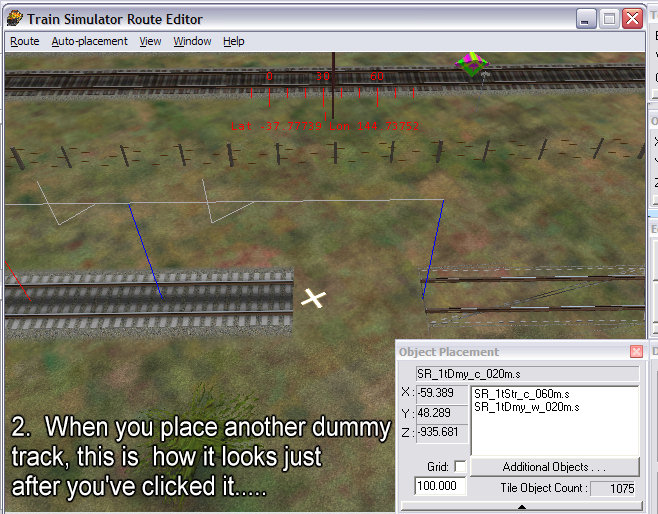
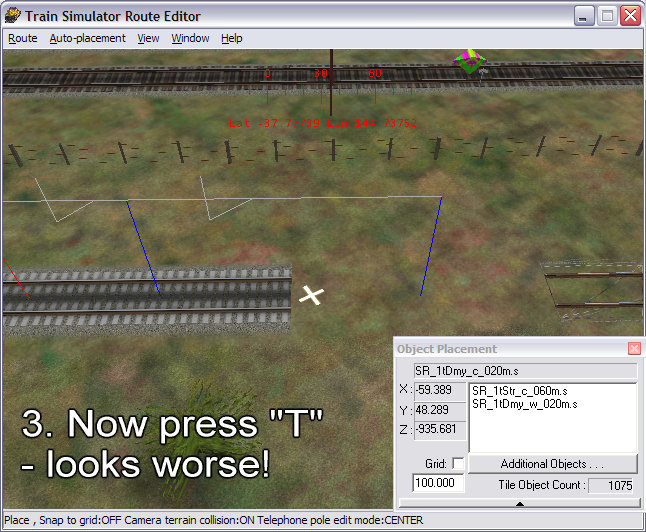
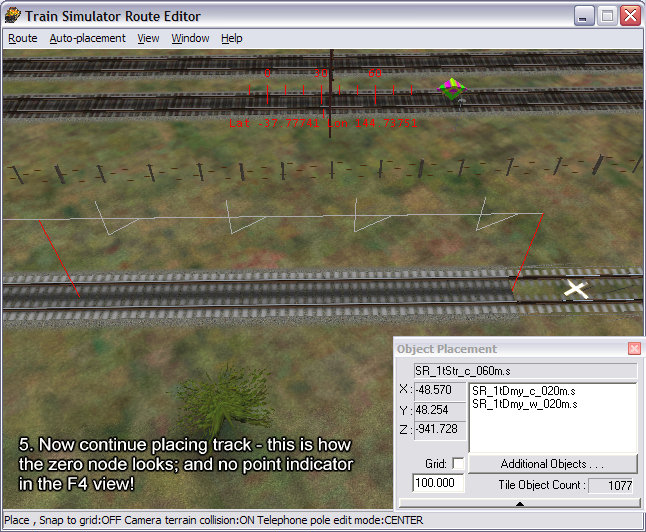
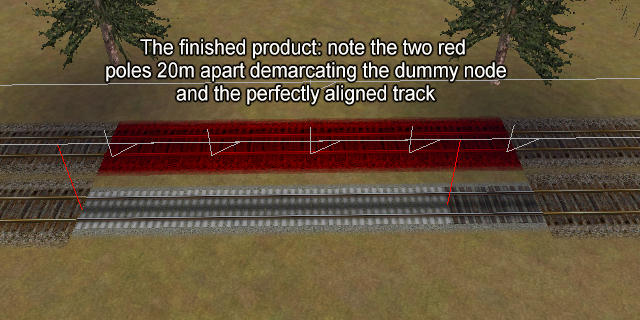
These are 20m tracks, a pair of which should be placed every 5-6km between nodes. Unlike zero degree switches in Xtracks, these dummy nodes will not show up in the F4 view. Placement is simple but not intuitive.

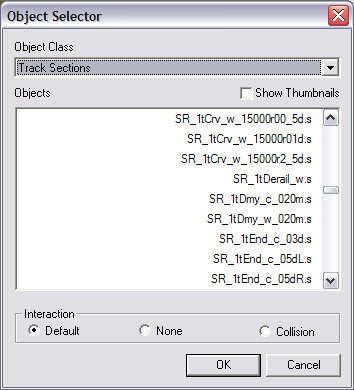
You will find the pieces as SR_1tDmy_w_020m.s and SR_1tDmy_c_020m.s depending on whether you want "w"ooden sleepers (ties) or "c"oncrete sleepers.


Installation

Let's start: the steps are explained in the following images:

  1. You will find the dummy nodes in the Object Selector screen:

    SR_node.jpg - 39kb

  2. First select a dummy node piece and place it in the route thus:

    SR_node1.jpg - 110kb

  3. Now place a second piece by clicking on the ground next to the first piece: it doesn't seem to attach to the first piece: don't worry we'll soon fix it:

    SR_node2.jpg - 115kb

  4. Now press "T": the track piece reverses but ends up even further away: trust me, hang in here:

    SR_node3.jpg - 115kb

  5. Press "T" again and the track piece lines up perfectly with the first dummy switch track placed:

    SR_node4.jpg - 117kb

  6. When you now place your next piece of track, you will have two red poles indicating the presence of the zero node: however there's no switch visible in the F4 view:

    SR_node5.jpg - 118kb

Now that was simple, wasn't it?


Adding Nodes To An Existing Route

This is a relatively straightforward procedure.

Generally you'll only be putting dummy nodes in the middle of nowhere (ie 4-6 km from another crossing loop or station) and their location does not need to be exact, so you can place them to avoid interactives such as speed limit signs etc.

I've highlighted and will delete a 25m track piece (for tutorial purposes, I've left the original track in default MSTS, the dummy node tracks in SR_concrete and filler piece(s) in SR_Wood; in addition I've placed double track and highlighted the untouched 25m second track to give you a sense of scale:

SR_node6.jpg - 47kb

Now I place the dummy node as per the tutorial linked above: note that when you've placed the two pieces correctly, the track length is 20m (Marc - brilliant and so very elegant):

SR_node7.jpg - 47kb

Now I place a 5m straight to make up the 25m.......

SR_node8.jpg - 51kb

And here's the finished section replacing the original 25m track section.

SR_node9.jpg - 49kb

Of course, the straight track you will replace with the dummy node doesn't have to be 25m long - it can be anything from 20m upwards.