How to Make a Symmetrical Part in TSM
by Paul DeVerter

A Port City Car Co. Project Copyright © 2004

Overview

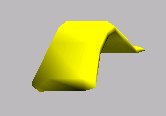
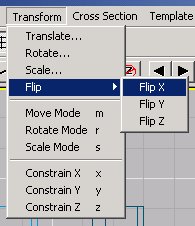
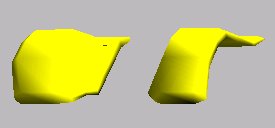
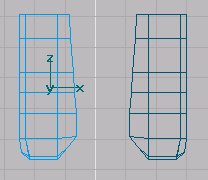
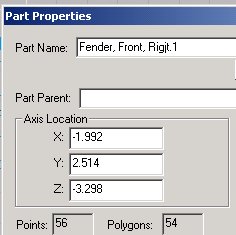
This is a short, mostly pictorial, tutorial on how to use a largely undocumented feature of Train Simulator Modeler to make symmetrical parts: that is, you make one part, such as the right front fender of a Model A Ford; you need an identical left front fender, except it is the reverse, and on the other side of the centerline.

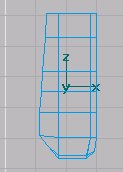
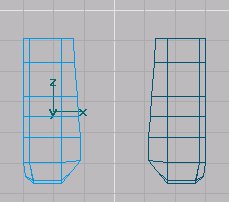
I tried copying the right fender, and then pasting it, and moving it over out of the way, which is easy enough.   But I could not figure out how to rotate it so that the outer right edge became the outer left edge on the other side of the centerline.  

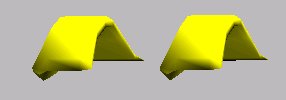
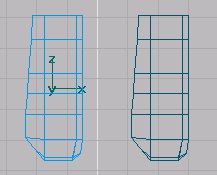
Well, I finally got it, and here is how.


Make the First Part

Using TSM with a basic Box tool shape, and an assortment of sections, manipulate the various points into the shape you want. Here we have a right front fender of a Model A Ford, c 1930.  It has been textured so it is easier to see.   Also we have the top view, and you can see the left hand portion fairing that will be next to the motor.

To make the symmetrical part for the left fender, you could start over with a new Box and sections and try to duplicate the opposite fender.  Or you can copy and transform the existing fender – which is a whole lot easier and quicker.

Copy the right fender, and then Paste it.   It will cover the right fender, so use the Move tool and move it in the X-axis to the left, over the centerline.   That gets it out of the way.

Now we have two identical fenders, and we need to make the left one the symmetrical equivalent. I tried all sorts of rotations, and got nowhere.


Finally, I fiddled with the Transform | Flip options.

Logically, it seemed to me that the left fender needed to be flipped about the Z-axis, and I tried that, as well as the Y-axis.   Finally, I tried the X-axis, and that was the answer I was looking for. I can not figure out how to predict about which axis you should flip the part.   Just try them all till you get the desired result.


Transform the Copy

Go to the Menu Bar and click Transform | Flip | Flip X

The only problem is that they are not equidistant from the centerline.   But this is easy to fix too.


Setting the Exact Distance from the Centerline

This is a trick Tim Muir taught me. Select the right fender and then press F2. You are now in the Part Properties window.  Notice the three numbers which give the position of the original right fender from the origin.   These are in the box called Axis Location.   Now go to the Part Properties window for the left fender, and note the difference. I have not changed the PartName for the right fender yet, so in typical TSM fashion, it is named Fender, Front, Right.1, instead of left.   You can fix that later.


The important thing here is that we moved the copied part over to the left in the X-axis. So, the Y and Z Axis Location numbers are the same.  We need to adjust the X Axis Location number of the left fender so that it is identical to, but the opposite sign of, the right fender.  Change the –1.502 to –1.992, Click OK, and now we are done, except for housekeeping.

After you look at this for a while and think about it, it will dawn on you that you did not need to move the left fender over in the first place, as shown in the second set of photographs.   Instead, you could simply Copy the right fender, Paste, and then go to the Part Properties window and set the X Axis Location number to a negative number.  This will automatically set your left fender over to the proper location. This tip courtesy of Ted Ahner.


Conclusion

The left fender is a symmetrical rendition of the right fender, and is properly located from the vertical and horizontal centerlines, and we did not have to reconstruct the left fender by moving a bunch of pesky points around.