How To Animate A Scenery Object - Part 2
by Paul DeVerter

A Port City Car Co. Project Copyright © 2004

Overview

This tutorial is for Train Sim Modeler, and is an add-on or Part 2 for the original tutorial entitled “How To Animate A Scenery Object”. That tutorial dealt with making a stationary steam engine, which has rotating, linearly moving, and combination moving parts. You will need to read and understand that tutorial before you will be in a position to learn from Part 2. Here we are going to build a further animated scenery object, but this animation is in a different plane.

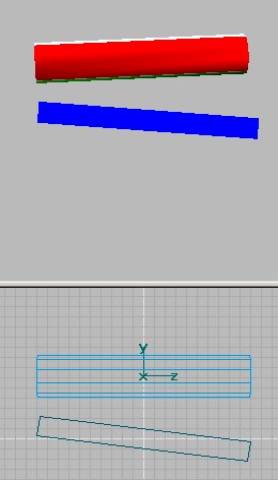
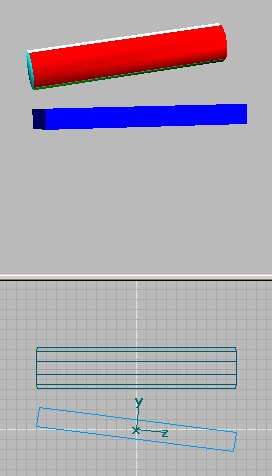
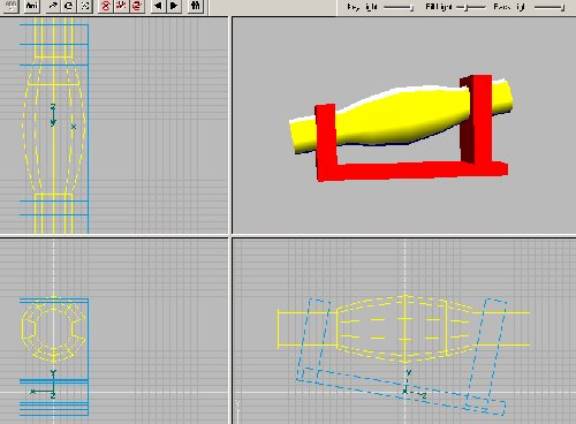
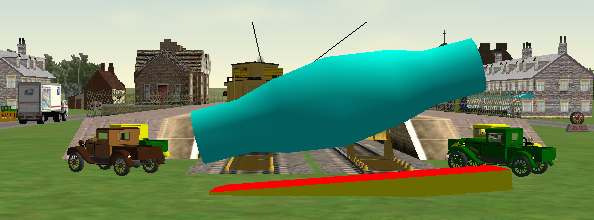
I found it difficult to build a rotating object that was not square to the X, Y, or Z axes. What I mean is an object, like a cylinder, whose long axis is at an angle to the surface of the MSTS Earth. It is quite simple to build a rotating cylinder whose axis is parallel to the Earth, or is vertical to it. But try changing the axis to something other than 90° to the primary axes, and what you get is a nutating or wobbling cylinder. It seemed to me there had to be a solution, and what follows is the method I stumbled upon.

Recall in the prior tutorial, there is this paragraph: “ The animated scenery object as a whole can not be rotated in TSM after you have animated a part, without redoing the animation. The whole thing can, however, be rotated in Route Editor as you place it in MSTS.” This last sentence is the clue to this tutorial.

And I have discovered a further rule for TSM animation: You must have a base or main parent part from which the rotating part(s) depend.


A Rotary Kiln

This model is a relatively simple rotating cylinder, whose axis of rotation is set at an angle to the Earth, say 20°. Many industrial objects are made in this manner, and perhaps the most common is the rotating kiln found in cement plants. In these devices, limestone and other ingredients are fed into the upper portion, and the ingredients are tumbled inside the rotating cylinder, while subjected to flames or hot gases introduced at the lower end of the cylinder.

Here is a general view of what we are going to accomplish. A cylindrical object which rotates on its axis, and which axis is at an angle to the Earth.


Constructing Your Rotary Kiln

Start by making a base or main part. A simple rectangular shape is nice, with a length long enough for the cylinder you are going to make next.

Parallel to this base construct a cylinder from a tube, and move it so that it is 3 or 4 feet above the cylinder. Make the cylinder dependant from the base in F2 - Part Properties. Texture the cylinder and the base. Make this Animated Scenery in Part Properties. Then animate the cylinder. All of this is described in the prior tutorial. You may even load one of the .rot files I provided in that tutorial, and save yourself the trouble of manually doing the animation.

When you are done with your construction, animation, and texturing, you should have something like this:

Try it out, and make sure the animation works, and that the cylinder rotates parallel to the Earth and does not nutate or wobble.

Next we will make some adjustments that will allow you to have a rotating cylinder that is not parallel to any major axis. Look at the next two photos:

Notice on the bottom left that the base has been rotated so that it is not parallel to the origin line (the heavy white line). But the cylinder is parallel to the origin. This is the secret to making the cylinder behave properly. And in the bottom right photo, the base is not only tilted, but so also are its orientation arrows, even though the X axis is on the origin.


Installation

What we want to end up with in the Sim, as opposed to TSM, is shown above in the top part of the photo on the right. That is, the base is horizontal and the cylinder is inclined, when in the Sim. But the cylinder remains parallel to the origin line in TSM.

Proceed to create this simple two-part project as a MSTS object, in the usual manner, and then move on to the Route Editor.

Here is where we have to be careful. What we need to do is rotate the object so that the base is horizontal to the Earth, and the cylinder is inclined. This requires careful manipulation of the object. At first the base will be sort of horizontal, and by moving around while in F4, and using the left mouse button, we can eventually get the base to be horizontal.

The next step is to lower the base into the ground, so that it does not show. This is done using the F3 key and the up and down arrows. Ultimately, you will have the object look like this:

The base is completely buried in the soil, and so all that shows is the cylinder. You need to be in wireframe mode, and then right-click, and tick the animation box. This is explained in the prior tutorial. Get out of the Route Editor and make the proper saves, and you have a rotating, inclined cylinder.

What we have done is rotate the entire object while in Route Editor, and doing so does not disturb the proper rotation of the cylinder. But attempting to rotate the cylinder from the horizontal while in TSM will lead to disaster.


Improvements

If you have mastered this tutorial, then you may want to add a few features. This could include bearing supports or walls at each end. And, perhaps you would like the cylinder to have a bulge in the center. You may also wish to remove all of the base's polys except for the upper surface; if so remember to remove orphaned points.

Go back to TSM and make whatever changes you might desire. The bearing supports at each end are simple blocks that are rotated to be perpendicular to the base, after the base is rotated. If you put your cylindrical kiln between two buildings, then you really do not need them. Here are some examples of what you might use.

Also included below is a Route Editor photo illustrating the various inclinations and aberrations you may run into as you try to make the base horizontal and before burying it. Just keep working at it and all will come out well in the end.


Conclusion

You have learned how to make an inclined cylindrical object, and place it in MSTS, and most importantly, how to make it rotate and not wobble while inclined.