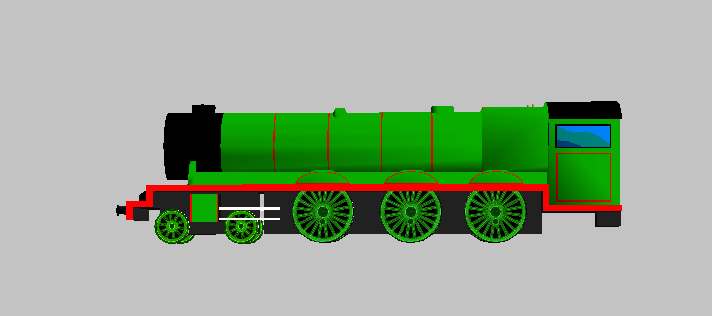
How to Animate Walschaert's Valve Gear using Abacus Train Sim Modeller v1.1
by Mike Wilson

Overview

In order to animate correctly, I think you have to know how a steam engine works, and in this case, the Walschaert's gear. I found this gear animation program a godsend - ttp://www.tcsn.net/charlied - get the Windows version.

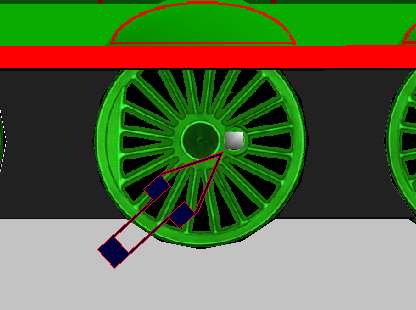
Walschaert's valve gear does not provide power on a single stroke. A vacuum is created in front of the piston head, which tends to pull the piston forwards, and this is assisted by steam applied from behind. When it reaches a certain point in the stroke, an admission valve is opened.  This breaks the vacuum, and causes live steam to be injected into the space ahead of the advancing piston. As this steam expands, it pushes the piston backwards. This power is transferred to the central driving wheels via the piston rod, and to the other drivers by means of the coupling rod.

A common error is the assumption that both sides of a steam engine are symmetrical. This is not the case - if both piston rods connected to the drivers at the same point, you would get a massive amount of force being applied to a single point on the wheel, which would be bad. (I understand that this is called 'Hammer Blow' and is the bane of the Civil Engineer's life.)

To offset this, the piston rods are attached to the drivers at an offset of 45 or 90 degrees to each other. If they were offset by 180 degrees, the loco could stall, but that's another story.

More information here... http://www.howstuffworks.com/steam1.htm

Disclaimer

I am neither an engineer, nor a locomotive crewman. My terminology may be suspect, and I'm prepared to stand corrected. I am using TSM v1.1, and I assume that you're familiar with that product.

Terms

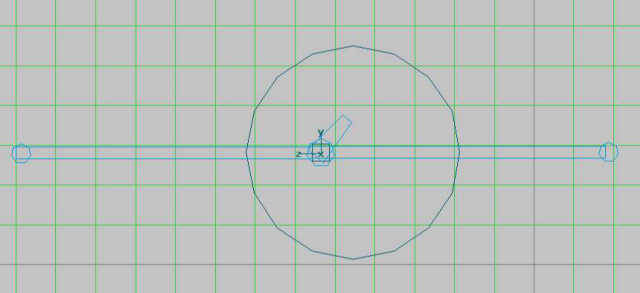
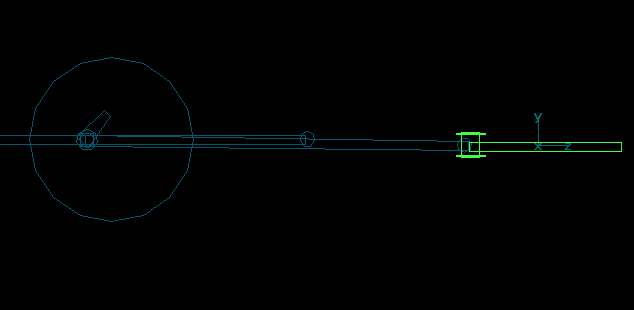
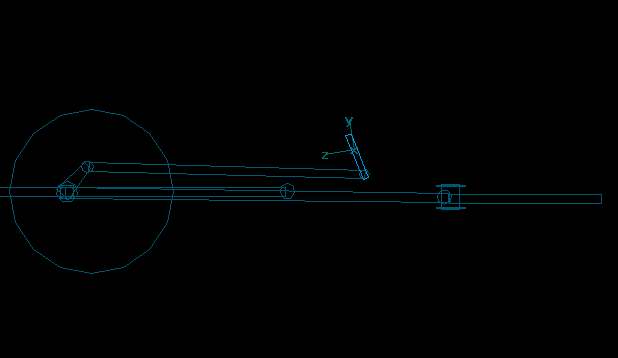
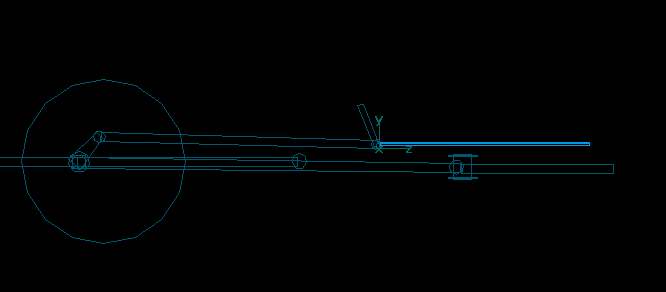
I assume that you're working on a locomotive that is travelling along the z-axis.

Motion: Movement along the z- or y-axes
Rotation is around the x-axis.

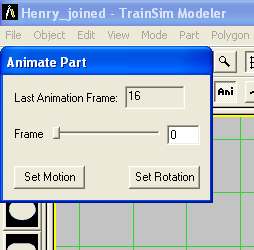
For steam engines, I prefer to use 16-frame rotation, because it looks smoother, and is only twice as much work. If you only want to use 8 frames, replace the number 16 with 8 in the rest of this spiel. In order to set this up in TSM, you need to go to the ‘project properties’ section.

  • Set locomotive type to Steam (duh)
  • Set last animation frame to 17 (or 9)


How To Animate The Gear

Let’s cut to the chase. I assume that you have already animated the wheel and built all of the bits you need for the motion. If you want to know how to do this - go see Richard Osborne's excellent tutorial. To animate the valve gear - pick a side, and do that first.

I chose the left side for these pictures. Here is Henry (by Darren Kent), shorn of motion.

Place a block on the central driver at 'bottom dead centre' - this is about 'six o'clock' on the wheel. Place a similar block on the other side, and either three o'clock, or 9 o'clock - you choose.  If you are working from plans, it'll probably tell you... Fuse these blocks to the wheel, and you can delete the points later.   The picture below shows the left side block, and I chose to set it at a relative 3 o’clock – offset 90 degrees from BDC.  It’s at the end of the arrow!

I assume you have already created the coupling rods = Parent for all rods should be "Main". Centre the coupling rod on the block you just created.

This might be a good time to save your work.

Refer to your drawings, and you'll find a 'poky up bit' that I tend to call an eccentric (see above) - this connects to the reversing gear, but does not rotate. If you haven’t built it yet - do so - fuse it to the coupling rod or the wheel - it doesn't matter which.  Note the other driving wheels aren’t rotated correctly.

Select the coupling rod, and push the 'Anim' button. There are sixteen frames of animation available to you, and frames 0 and 16 will be the same. This part does not rotate, only move along the y and z-axes. Without moving the part at all, and the animation frame set to 0, press the "Set Motion" button. Now change the animation frame to 16 and do the same thing. See below.

Select frame 1 - you will see that the wheel has moved, and the block you added is now in a new position. Lock the x-axis, then move the coupling rod so that its centre is on the block. Repeat for the remaining frames of animation. Check the animation when you've finished to make sure it's nice and smooth, with no obvious jerks.

This might be a good time to save your work.

The piston rod is the next task - this has motion (z-axis) and rotation (x-axis). Make sure that the pivot point is at the end closest to the front of the locomotive. To move this, you need to press shift and then move it with the mouse. (Don't forget to lock the axes you aren’t using!)

Animate as before, moving the rod backwards and forwards, and rotating so that the end that attaches to the coupling rod (the so-called Big End) is always in the same relative position when compared to the coupling rod. To rotate, lock the y- and z-axes and rotate using the mouse. In addition to setting the motion as before, press 'set rotation' when you're happy with the position of each animation frame. Check the animation when you've finished.

This might be a good time to save your work.

Animate the crosshead slide so that it moves along the z-axis in response to the motion of the piston rod.

Next, the reversing link arm - this bit is connected to the reversing rod at the top, and the eccentric on the coupling rod. The lower end will move up and down in response to the eccentric. The whole arm will move backwards and forwards as well.

Rotate the reversing link (the little rod that dangles from the foot plate) so that its end stays in relative position to the link arm.  These two parts are co-acting, so you may need to fiddle around a bit before they are perfect.

Finally, you need to add the admission valve actuation rod to both sides. This is co-acting with  the motion of the reversing link, and the rod slides in and out of the top of the cylinder block.

Now save your work and compile it - voila!

If, like me, you have elected to go with a 16-frame animation, there is one thing left to do.  The animation within MSTS defaults to 30 FPS, so your motion will appear to be running in half speed.  You need to uncompile the .S file for your locomotive, amend the line:

   animation ( 16 30 )

to read:

    animation ( 16 60 )

Then recompile.

If you are uncomfortable mucking around with the .S file, simply halve the Wheel radius in the .ENG file.


Conclusion

In conclusion, this method of animation is quick and dirty, but works without any tedious calculation.  It’s probably not as accurate as other methods but if you are having trouble, then this may help you out.  Feel free to email me if you have any trouble, or better yet post at the UK Trainsim Forum, and you’ll be overwhelmed by the offers of support, as I have been.