Using ConTEXT Editor in MSTS
by Yuri Sos

Overview

ConTEXT is a useful Unicode-aware freeware editor that is, in my opinion, ideal for editing and debugging MSTS files such as ENG, WAG, SD, CVF and SMS files. It works on any version of Windows from 98 to Windows 7.

ConTEXT was first brought to the MSTS commumity's attention by Pete Willard who designed the first highlighter specifically for use with MSTS files.


Where To Get ConTEXT

ConTEXT's home page may be found at http://www.contexteditor.org/.

The current version (at 14 August 2009) is 0.98.6.

Click on the "Desktop Version" at the page above, download the Setup file to your PC.
Double-click on the installer to commence installation.


Modifying ConTEXT's User Preferences

Click on Options | Environment Options... then click on the appropriate tabs:
These are the options I use:

The "Editor" tab contains the option to turn on line-numbering: this alone makes the editor worthwhile as it allows you to quickly find the exact location of an MSTS error message. I also set the tab spaces to 5 as that seems to match Kuju's ENG and WAG files best.

If you don't like the colours I've set within the highlighter, you can change each one by clicking on the "Color" tab, selecting the appropriate component to change, then selecting the foreground and background colours as desired.

I don't recommend setting associations inside ConTEXT as it lumps them all under the "Type" filename of "ConTEXT document". I'll show you how to set associations shortly.


Installing The Custom MSTS Highlighter

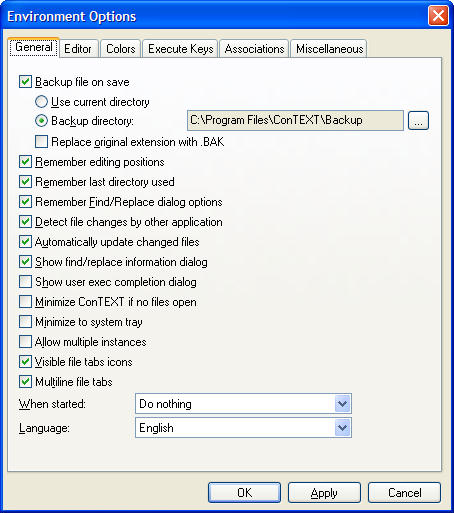
A wonderful feature of ConTEXT is the ability to download and/or write custom highlighter files that can be called from within ConTEXT or can be configured to open with a given file.

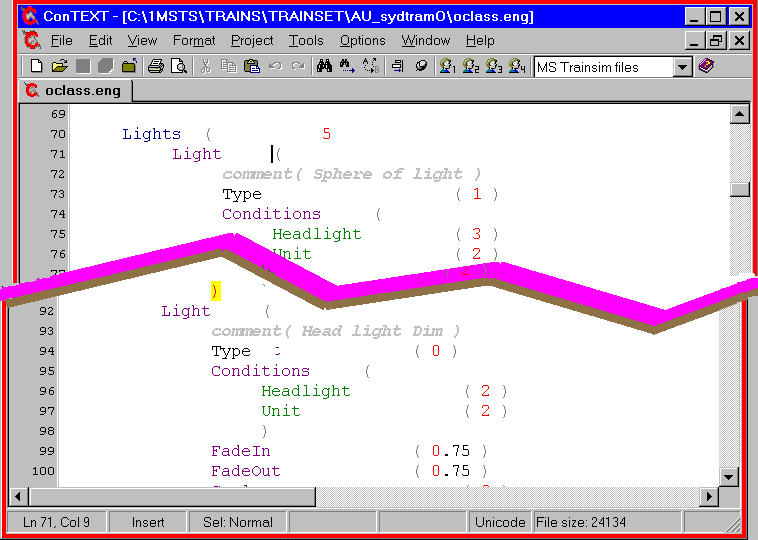
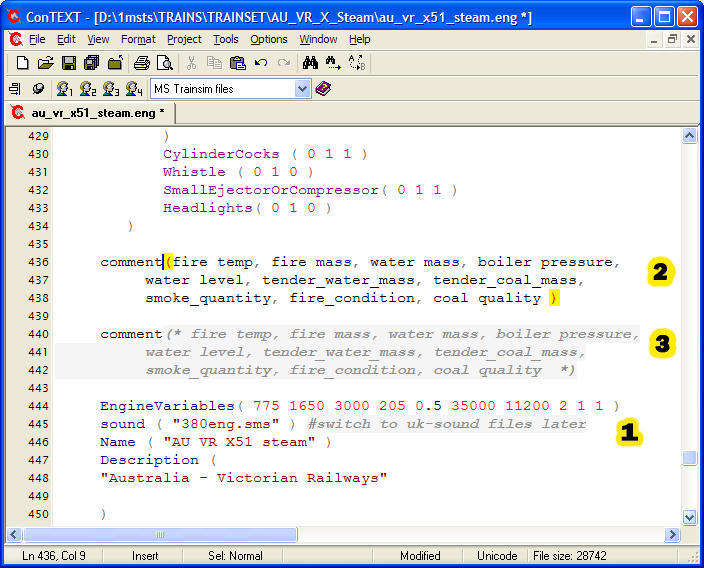
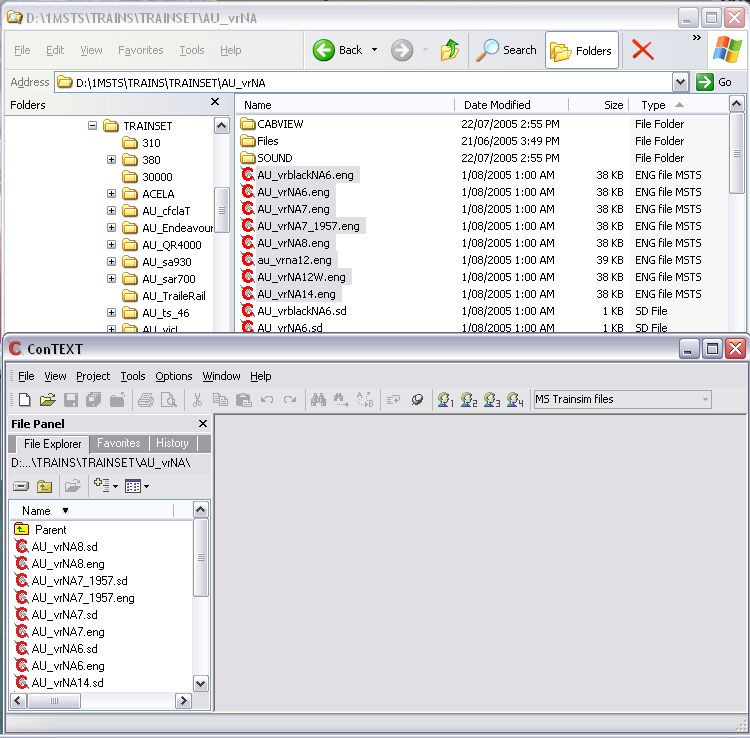
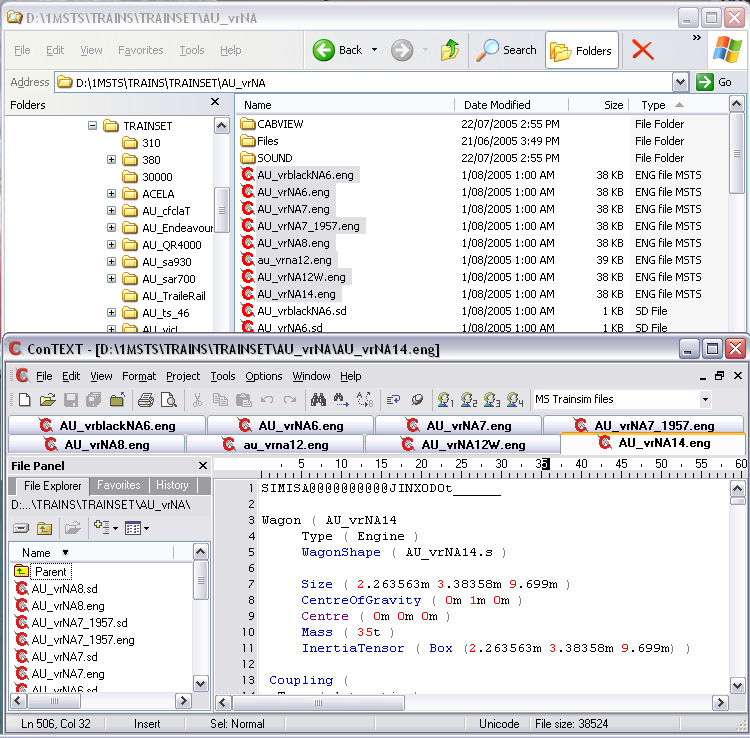
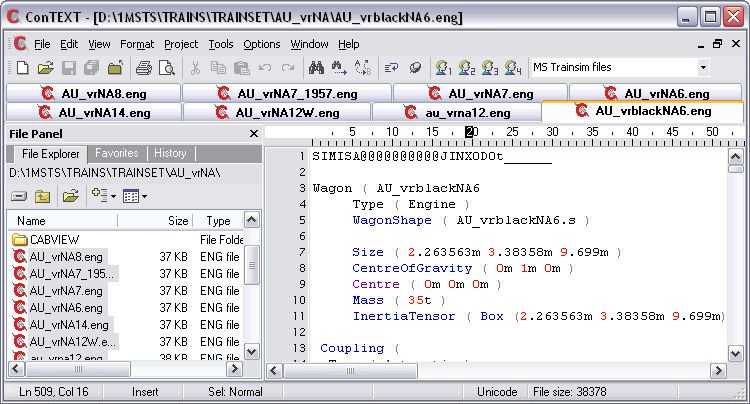
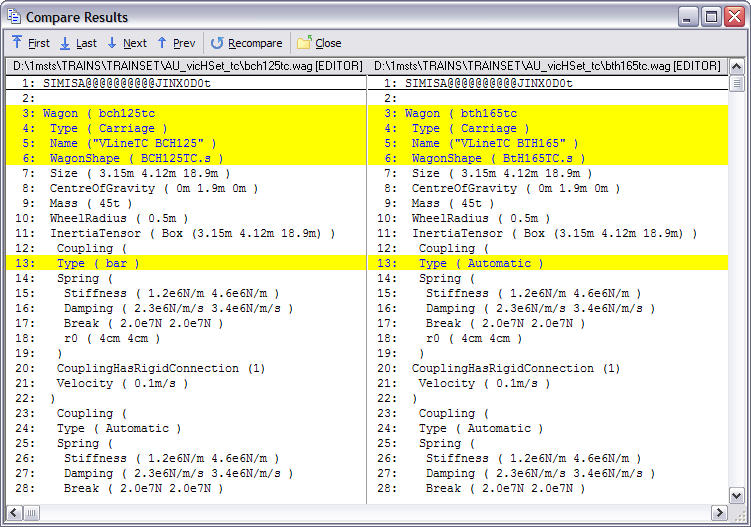
If you've perused the screenshot above, you'll see that various keywords inside the ENG file are highlighted in specific colours; even the matched brackets are clearly visible.

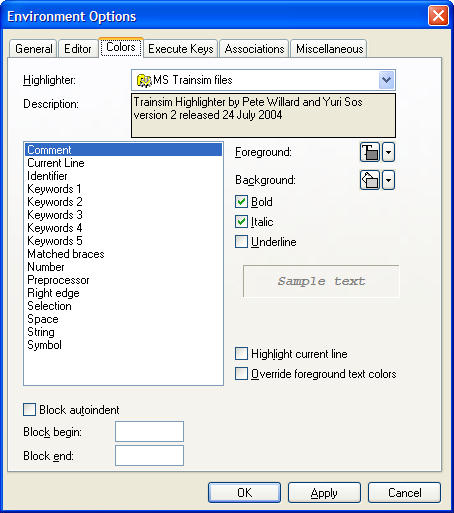
Pete Willard wrote a Trainsim Highlighter for ENG and WAG files: I've expanded it to encompass ENG, WAG, SD, CVF, SMS and .CON files as well.

Download MSTS_CTXTv2_1.ZIP, (a 5k file) - this is version 2.1 (released 2 August 2005) of my highlighter. I do not recommend using the MS Highlighter on the ConTEXT webpage as it contains errors in highlighting the Comments section.

Unzip the contents into the /Program Files/ConTEXT/Highlighters folder. Now whenever you open a .ENG, .WAG, .SD, .CVF, .SMS, .CON file using ConTEXT, this highlighter will be utilised.

The highlighter is set to show keywords in different colours, based on the "hierarchy" (for want of a better term) that you normally find them in a MSTS file. The colours are arranged as Navy, Purple, Green, Blue, Teal.

In addition, matched brackets are shown in a red on yellow colour. Comment lines are shown greyed out and italicised.

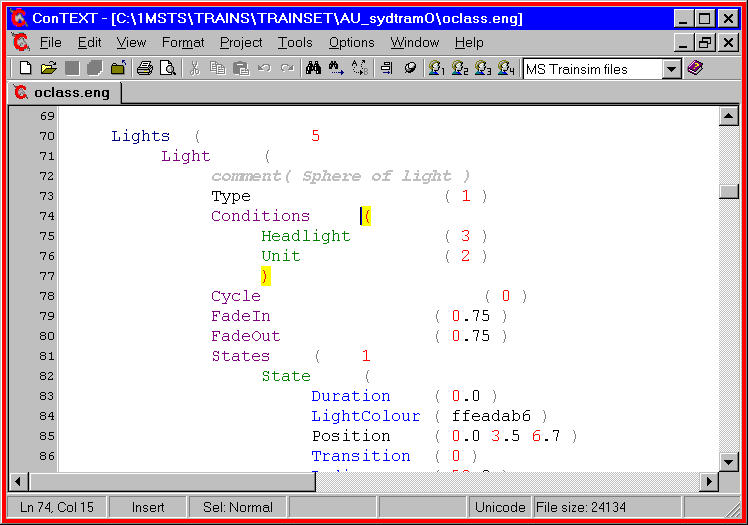
This provides you with a visual aid to check that the most likely correct keywords are in the right place. A few keywords have been excluded from the highlighter: this is because they appear at different levels in the various MSTS files and the "incorrect" colour" adds to the confusion. These non-highlighted words include Type Position Style Direction.


Matching Brackets

Arguably this will be one of the biggest reasons for using this editor: the match brackets function is one of the quickest ways to check where the other half of a bracket pair is located.

It is very simple to use this function: simply place the cursor immediately to the left of the bracket you wish to check: both brackets will then be highlighted: look at the image immediately above to see how this works.

This works both in the forwards and the reverse direction.

If the matching bracket is not located on the same screen as the first bracket, the first bracket will not highlight, indicating that the matching bracket is off-screen. You can:

  1. Simply use the scroll bars at right to scroll down (or up as the case may be - this feature works in both directions) until you find the matching bracket (see image above);
  2. use the "find matching bracket" function (CTRL+M) on an ending bracket and the editor will jump to the matching bracket.


Highlighting Multi-line Comment Sections

A limitation of ConTEXT is that you can only have one highlight in operation per character, so if you use keywords Comment and Skip to mark the beginning of a comment line, you'll lose the ability to match brackets on that section.

My version 2.0 MSTS highlighter (linked above) attempts to provide a solution to this problem.

  • The "#" that marks a comment on a single line is active (see "1" in image below);
  • Bracket matching will continue to operate for Comment lines (see "2" in image below);
  • If you add an asterisk (*) immediately inside the opening and closing brackets (see "3" in image below), the complete "Comment" section will be highlighted. This will work if you do this to comment out a "Passenger section" for example. Adding the asterisks inside the brackets will not affect the operation of the .ENG or .WAG file. The downside is that you lose bracket-matching for that commented section only.


Associating MSTS files with ConTEXT

Windows XP

If you've never done this before, double-clicking on any ENG file will bring up the image below.

Click on the button "Select Program from a list" and click "ok".

You will then see this window. Depending on your system, ConTEXT may be found as a "Recommended program", "Other program" or you may need to click on the "Browse" button to "c:\Program Files\ConTEXT". In the blank field under the list of programs, type in "ENGine file MSTS" or whatever you want to appear as "Type" of file when browsing in Explorer, then "ok".

From now on, whenever you double-click on an ENG file, ConTEXT will open it for you. Repeat the process for WAG, SD, CVF, SMS and CON files.

If you've already got these files associated with another program, it's only a little trickier to get ConTEXT to open them for you.

In Explorer, click on Tools | Folder Options | File Types. Scroll down the list till you find and click on the entry for ENG files. It'll probably look like the image below.

Click on "Change" and select ConTEXT from the list as below.

Click on "Ok", then "Close". Now you can repeat these instructions for your WAG, SD, CVF, SMS and CON files.

Windows 7

A similar process exists for associating files under Windows 7; these two images should be self-explanatory:


Opening Multiple Files

Method #1

Open Explorer. Click on the heading marked Type to sort the files by suffix.

Select the files you wish to open.

Open ConTEXT (see image below).

Now drag and drop the files onto ConTEXT. All files are opened for you. You can move from file to file by clicking on the filename tab at the top (see image below)

Method #2

Open ConTEXT and using the File Panel at left, browse to the folder you require. If the File Panel is not visible, click on View | File Panel or press Ctrl+Shift+E to make it appear. Use the scroll bar to move horizontally to the Type column and click on the column header.

Select the files you wish to edit (see image below)

Drag-and-drop the files onto the workspace thus...........


Global Find and Replace

This is a powerful utility within ConTEXT. The best way to demonstrate this is by example.

Here I opened a large number (139 in fact) of .W files from a route in order to change a StaticDetailLevel from 0 to 2.

I went to the Route's World folder, clicked on TYPE to sort all the .w files together.

I opened ConTEXT with no file.

I selected the 139 .w files and drag/dropped them onto ConTEXT. See image below.

It took ConTEXT about 30-40 seconds to digest and open the files.

I selected and copied "StaticDetailLevel ( 0 )".

I pressed Ctrl-R and filled in the dialogue box as below.

Less than 5 seconds later, I had this message:

Finally I clicked on the "Save All" icon (fourth from left) and saved all my changes.


Comparing Two Files

This is a another powerful utility within ConTEXT. I've found it only works successfully with both files loaded into ConTEXT, even though options allow you to check a file from disk.

Open both files in ConTEXT. Click on Tools | Compare.

In the top dialogue box, check the current file radio button.

In the lower dialogue box, select "editing file" and select the other file in ConTEXT (see image below):

You can alter the colour and line numbering settings by clicking on "Settings" (see image below):

The two files open in a new window: note that line differences are highlighted:

Even gaps/blank space is highlighted in a different colour: