Using Google Earth To Place Markers in Route Editor in MSTS
by Yuri Sos, based on work by Javier Aranda and Doug Kightley
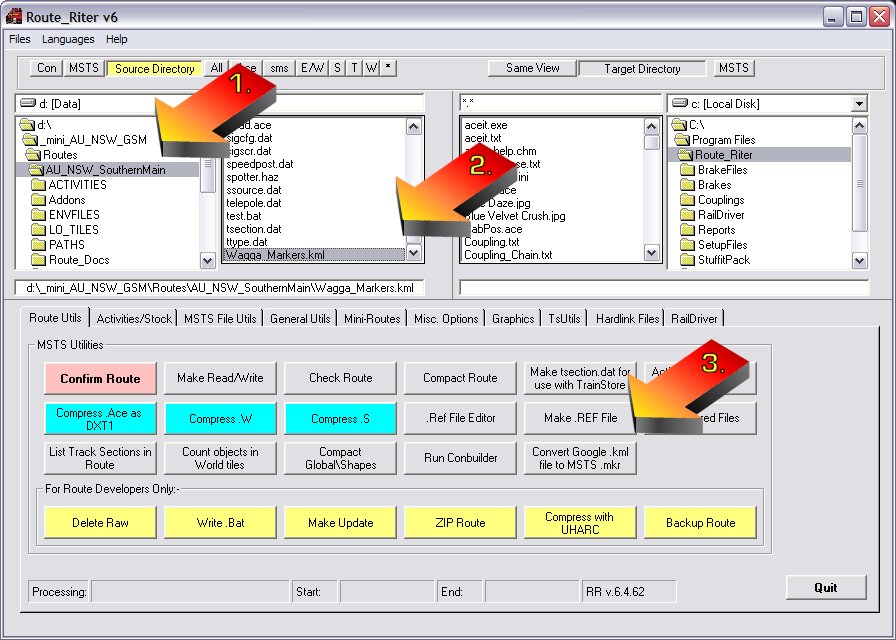
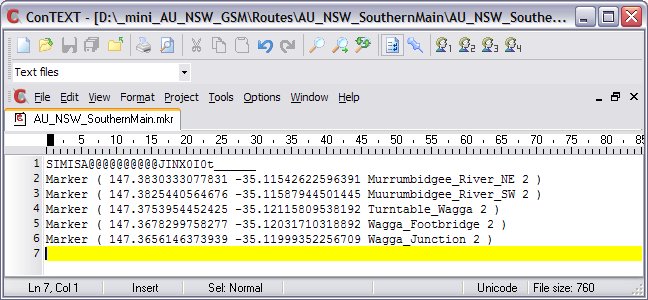
KML to MKR conversion by Route Riter by Mike Simpson

Overview

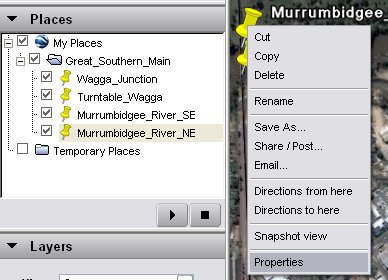
What is Google Earth?

To quote Google themselves, "Google Earth combines the power of Google Search with satellite imagery, maps, terrain and 3D buildings to put the world's geographic information at your fingertips. But Google Earth is much more than just a mapping software. It's a tool for viewing, creating and sharing location-specific information which can be explored in an interactive and visually intuitive interface."


Download

Download Google Earth at http://earth.google.com/. It's a free download and at the time of this tutorial update (28 Mar 2010) was at version 5.

You'll also need Route_Riter ver 6.4.62 or higher. (As I wrote this tutorial, I "commissioned" Mike Simpson to assist with converting the .kml file: amazing programming guru that he is, Mike was able to come up with yet another new Route Riter function almost overnight. The route used to generate screenshots is Russell Beer's excellent "Great Southern Main".)


Configuration

Set up Google Earth - numbered points match arrows in image immediately below:

  1. Click on View, Select Grid (to turn Lat/Lon grid on;

  2. Click on Tools | Options;
  3. In the 3d View section under "Show Lat/Long, select "Degrees";
  4. Optionally, you may want to turn on the display of rail and tram tracks: under Layers at left, expand "Transportation" and check "Railroads" and "Transit".
  5. In the Places view box at left, right click on My Places and select Add | New Folder;
  6. A dialogue box opens - rename "Untitled Folder" to a folder name of your choice (example used here is Great_Southern_Main) and click "Ok":


Collecting Data Points To Be Used As Markers

Start by clicking once on your Great_Southern_main folder to select it. Now scroll and zoom into the site of your route in Google Earth.

You create a placemark either by clicking on the Push-Pin icon (arrow #1 below) or by using Crtl-Shift-P. A push-pin placemark (arrow #2) and a dialogue box appear. Drag it to the location it is required. Click on the dialogue box at left and change the name "Untitled Placemark" (arrow #3 below) to the name of the marker. Important note: be sure to leave NO SPACES in the placemarker name: use uinderscores if you need multiples words.

Click "Ok" when you're done.

Repeat this process placing and naming markers as you move along your route. As you insert the placemarks, you will see that they appear under "Great_Southern_Main" in the Places pane at left.

You don't need to do all the placemarks in one session as Google Earth will save all the placemarks if you exit and return later.


Saving Your Data

Once you've finished marking out your route, right click on the folder name "Great_Southern_Main" and select "Save As" from the drop-down box.

Save the file to your route's top folder and use the .kml extension.


Converting Your Data

Route_Riter ver 6.4.62 or higher will now convert a Google Earth created .kml file to a MSTS marker file.

Browse to your route in the left-hand window (arrow #1 below).
Browse to, and select, the .kml file in the adjacent window (arrow #2 below).
Click on the "Convert Google Earth...." button (arrow #3 below):

A "Save Marker File" dialogue box appears: select the route (arrow #4 below) and type in the filename so that it bears the same name as the .trk file (arrow #5 below). Note that you can have only one active marker file in your route at a time. If you have a complex route, you may wish to set up seperate marker files for track and infrastructure, roads and so on. If so, save the marker file to a different name, then rename whichever one you want active to the route's filename.

The process defaults to marker flag type 2 in your route: you can open your .MKR file in Wordpad or ConTEXT editors and you will see the marker file thus:


Markers In The Wrong Position

Occasionally, you'll see a row of markers with one or more markers in obviously the wrong position in MSTS, but the place-markers look ok in Google Earth.

To correct this, right-click on the marker in Google Earth, select Properties........

...... and select the "View" tab in the dialogue box that opens.

Click the "Reset" button, then "Ok"and resave the kml file as above and the marker position will be corrected.