Idiot's Guide to laying dynamic track in MSTS
by Jim "Sniper" Ward

Overview

There's been a few questions about this, there's no real right way or wrong way, but since I was making a wye anyway I thought I'd make a little tutorial on what works for me.

First thing - where is Dynamic Track? You'll find it in Track Sections under "D".

That can be a little hard to find, especially if you've installed Xtracks and you've got a long way to scroll down. Here's a quick tip (by Yuri Sos) to make it *so* much easier to find your dynamic track piece.

Open the .ref file for the route you are working on. The Dynamic Track entry is usually the first entry in this file, see?

Simply put a space between the quote mark and the word dynamic as demonstrated below:

Now when you open Track Sections | More, you'll find that it's sorted to the top of the list:


Laying The Track

Get familiar with that dynamic track window. If it isn't already open, click on window at the top of the route editor screen, then dynamic track, and you'll get this:

Note the buttons on the left are for moving it a lot, the ones on the right move it just a little. The "start" is the length of the first straight section, the "middle" will be the middle if you have the second curve enabled. If you are only using the first curve, the "middle" will actually be the end, because there's nothing beyond it. Checking the box for the second curve gives you the "end", which in that case would be the last straight section beyond the second curve. I'm putting together a simple wye track here, so I don't really need the additional complication of a compound curve. OK, here we go.

Oops. That's NOT the way to do it, dynamic track only curves to the left, and the above would have to curve to the right. Let's try it from the other end.

That's better. Check the box to enable the first curve, then click the left hand up arrow next to "middle" (actually the middle is the end if only one curve is enabled, remember?) and crank it out to 50 meters or thereabouts so you can see where it's going.

Here's where it gets a little confusing. The up arrow increases the radius of the curve, but to make the curve curve more it's the down arrow on the angle. It actually makes sense tho, bigger broader curve up arrows, smaller tighter curve down arrows. The default minimum 25 meters ain't gonna take an 0-4-0 tho, so the first thing is to broaden the radius. I usually bump it up to 120 meters to start for low speed sections like yards, 250 meters for a mainline. Next I hold the down arrow on the angle to tighten the curve (make it curve more) until it gets in the ballpark of the section I'm trying to connect to.

Now we need to fly over to the other end to get a close up of the alignment process. Be advised, if you click on something else it will deselect the dynamic track. You'll know if you did that when all the little numbers in the dynamic track window disappear. if that happens, just fly back to the beginning and click on that funny little green trapezoid to reselect it. Let's see how close I came:


Adjusting Dynamic Track

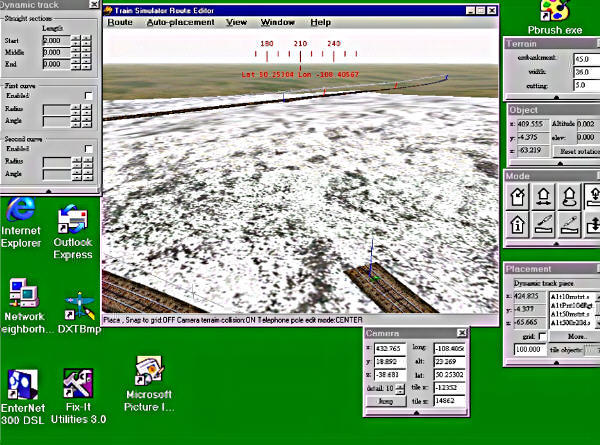
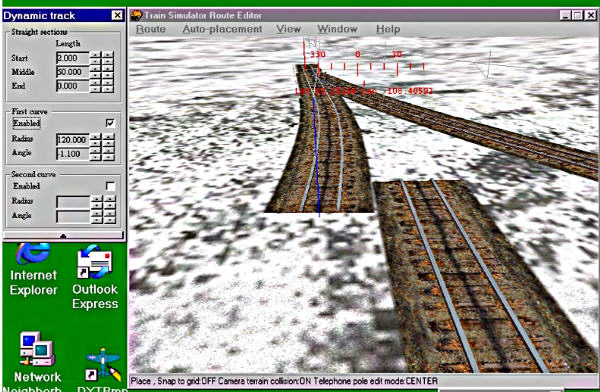
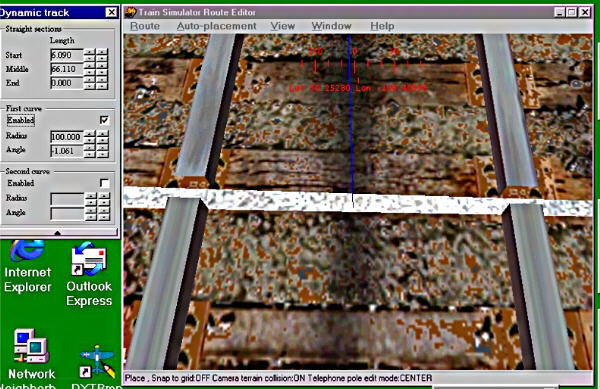
Hmmm, that's not gonna work. The curve is just about correct, because the rails are almost parallel, but the end of the dynamic track is too far to the right. Normally I would adjust it to the left by reducing the length of the "start" piece of straight track, but it's already down to the minimum. Gonna have to tighten the radius, let's try 100 meters.

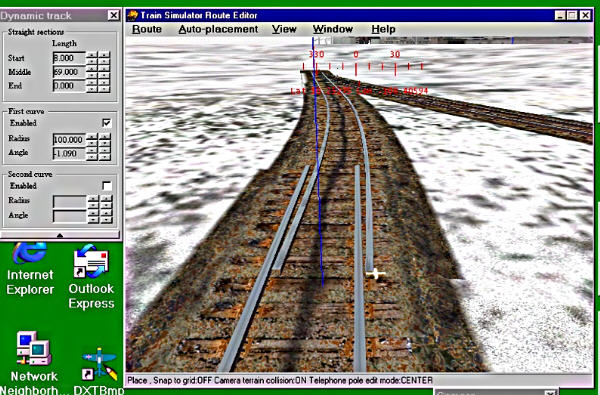
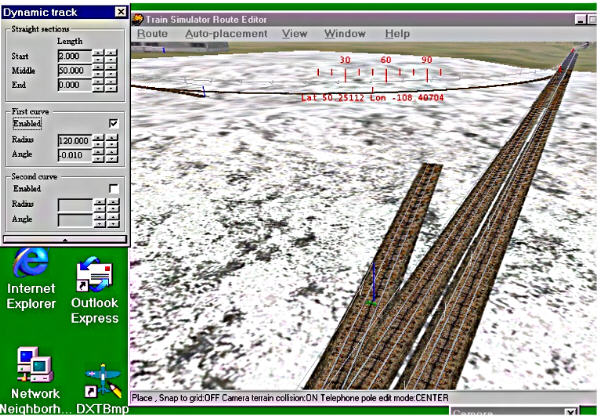
That's better, it moved it to the left so much I had to increase the "start" section to 8 meters to move it back to the right, and had to increase the middle to get my overlap back. You always want a few meters of overlap at the end of the track at this point, because it makes it easier to see if the lineup is correct. As you can see, it's not, the dynamic track is cocked to the left. Since it only curves left, I need to tighten the curve to angle it more to the left, or loosen the curve to angle more to the right. So in this case I need to reduce the angle (up arrow) to cock it to the right.

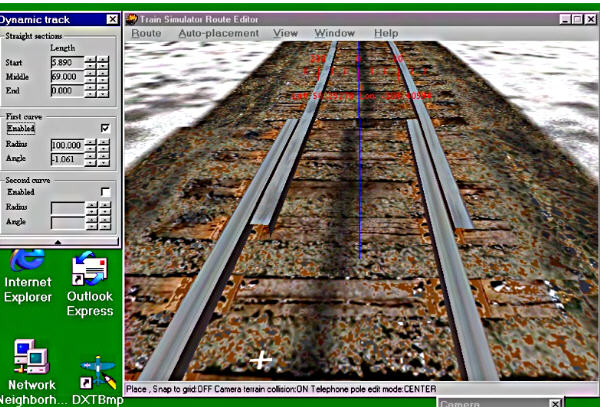
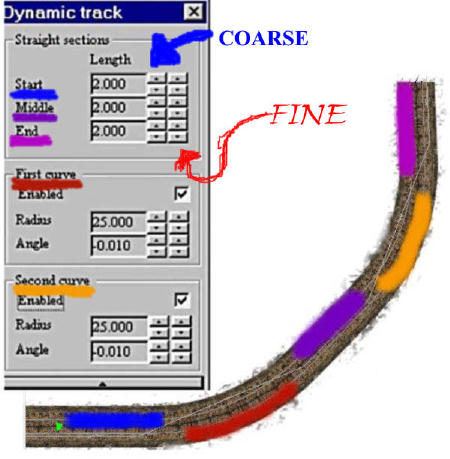
At this point I'm also using the fine tuning buttons on the first piece of straight track to make it easier to see if the rails are parallel. This looks pretty close, now to go for horizontal alignment using the same buttons.

Looks pretty smooth, but the game won't accept that much overlap, so now is the time to get rid of it. So click on the down arrows on the "middle" section to reduce the length and open a gap. Then zoom in closer to see the final adjustment. Holding down the END key while using the keyboard arrows makes this easier to position the view.

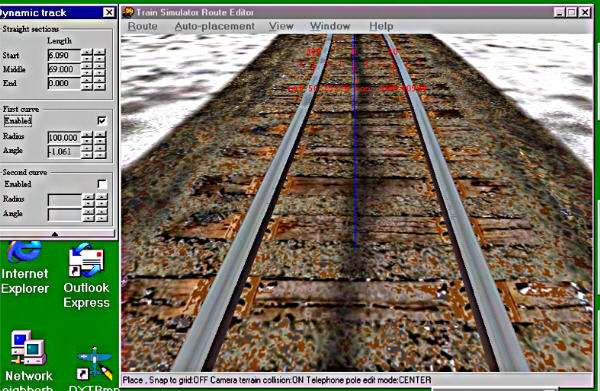
Now we use the fine tune buttons to adjust the length of the middle section to close the gap.

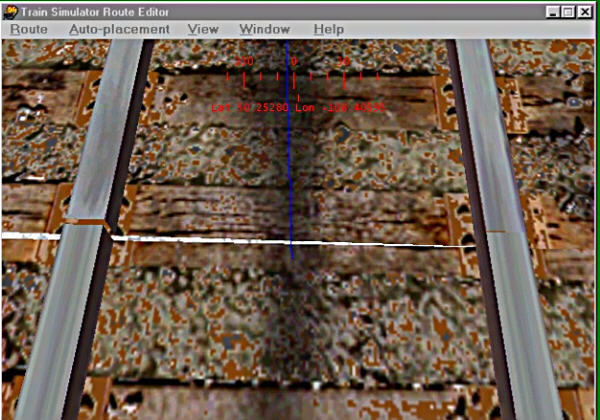
The right side is closing before the left, indicating that the angle isn't exactly right. Two more strokes on the fine tune up button would close the gap, with only a little 
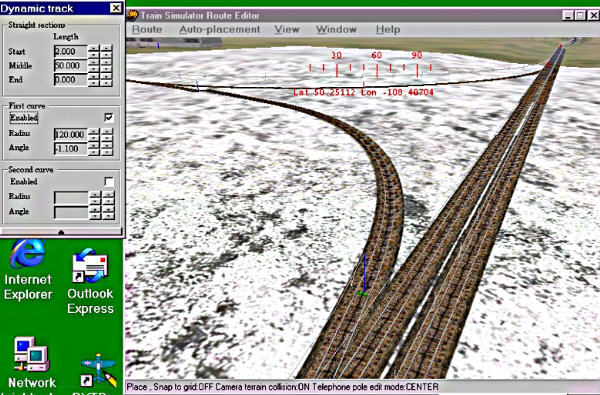
overlap on the right hand rail, and the game would accept it like that. But let's get finnicky and try for a perfect join. Lessee, gap on the left bigger, cocked too far left, need to decrease the angle to cock it more to the right. Up arrow on the angle, less curve. Then I gotta adjust the length of the two straight sections to line it up again.

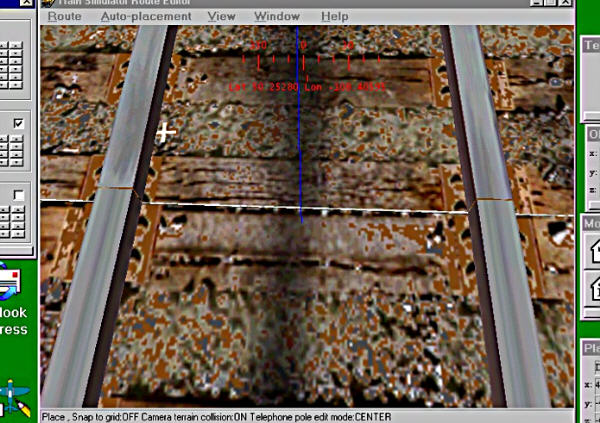
Can't beat that. My own personal standard to avoid rough track joints is the second gap has to close within 2 fine strokes after the first, but until you get comfortable with doing this it's not really necessary to get that persnickety.

The final acid test, click on the terrain somewhere to deselect the dynamic track piece. If the blue line disappears, it's a valid track join.