Using Maps/Aerial Photos as Transfer Objects in Route Editor
by Wayne Campbell

Overview

This is a technique to use scanned maps or airphotos to aid in exact placement of track and structures. The technique allows a single map to cover up to a 500 meter square area and works best in dense urban areas. For larger areas, traditional methods with markers is easier. I am fortunate to have Fire Insurance maps for the populated areas of my route. These show exact locations for track, bridges, rivers, roads and buildings. With these maps, I can lay track right along the lines on the map, drop structures in the exact spot and place fences exactly along property lines.


The Procedure

This technique uses the Transfer feature to lay the maps full scale directly on the terrain inside RE. As with most things, it takes much longer to explain than to do.

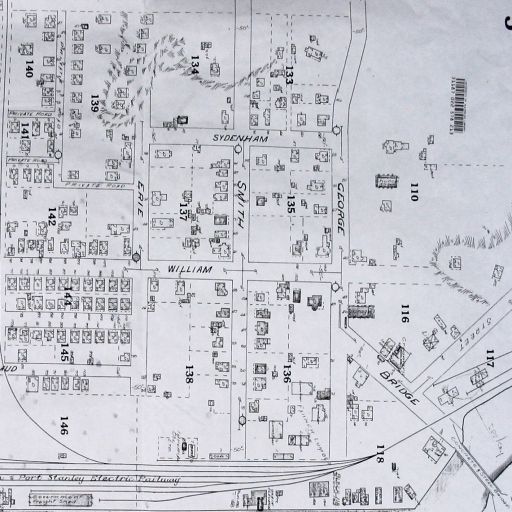
  1. The first step is to scan in your map and work out the scale of the scanned image. To do this for my example, I loaded it into my paint program and determined from the scale printed on the map that 100 feet was equal to 130 pixels ( In PSP7 use the rectangular select tool for measurements ). I know that 100 feet is equivalent to 30.48 meters. 130 pixels divided by 30.48 meters = 4.26 pixels per meter. So my map scale is 4.26 pixels per meter.
     
  2. Most maps are probably too big and will have to be cropped. The biggest map that we can load into RE as a transfer is about 500m by 500m. In my example that works out to 2130 pixels square ( 500 x 4.26 ). Now, I use the crop tool ( don’t resize! ) to crop around the area of interest, ensuring that it does not exceed 2130 pixels square. Make a note of the size of the cropped image. In my example, I cropped it at 2096 x 1861 pixels. Using my scale of 4.26 pixels per meter, this works out to 492 x 437 meters. Remember this figure because later RE will ask for the size of the transfer.
     
  3. Now the map must be resized to a MSTS standard 512x512 pixel square texture. For this, use the RESIZE tool. Regardless of the original cropped size of your map, resize it now to 512x512 pixels.
     
  4. Save the map as a windows bitmap with a descriptive name. I usually append the original size of the map to the filename. For example, this map was called PSWEST-492x437.BMP Now you have a 512x512 pixel bitmap representing a map 492x437 meters big.

  5. Next we must convert this into a Transfer object in RE. First I use TGATool2 to export the bitmap image into my route texture folder as an .ACE file. Use ‘No-Alpha’ with ‘Compression’.
     
  6. Now I add the transfer to my route’s .REF file. The entry looks something like:

    Transfer (
        FileName (PSWest-492x437.ace)
        Class ( Transfers )
        Align ( None )
        Description ( PSWest-492x437 )

  7. We are nearly there. Open RE and go to the approximate location for the map.
     
    1. Press F5 ( Placement Tool );
       
    2. Click on ‘MORE’ in the Placement Dialog Window;
       
    3. In the Object Class drop-down box, select Transfers;
       
    4. Find your transfer, PSWEST-492x437 for example, in the list and double click on it to select;
       
    5. Use your placement tool to drop the map transfer onto the ground. You will see it as a tiny 1 meter square map on the ground under the green triangle shaped marker;
       
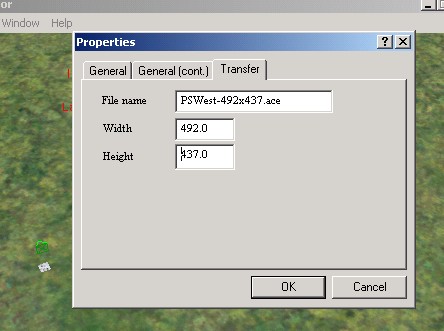
    6. With the marker still selected, right click to view the properties of the map;
       
    7. Go to the transfer tab and key in 492 x 437 for the width and height of the transfer. Now you see the advantage of including the dimensions in the filename.


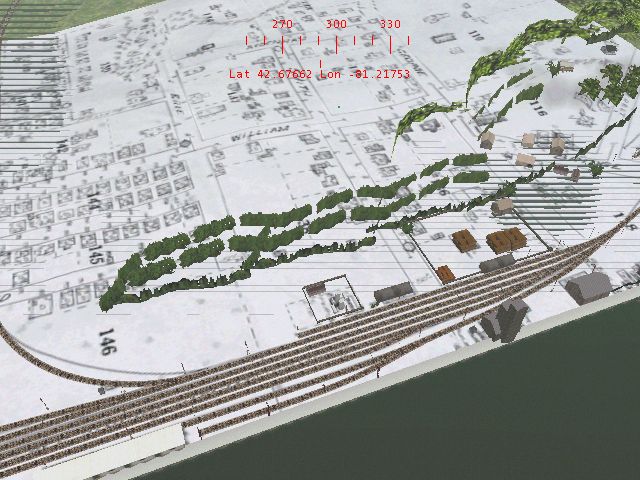
  8. After you click OK, the map appears full size on the terrain. You can use your F3 and F4 tools to rotate and position it properly relative to other objects in the scene.


Other Tips

Here’s a couple of additional tips:

  • When you are finished using the map, go back to its properties and set its width and height back to 1 meter by 1 meter. This gets the map out of the way, but it conveniently stays at the right location on the route in case you need it later.
     
  • When you are preparing your map in your paint program, rotate it so that north is straight up. That will save you having to rotate it when you drop it into RE.
     
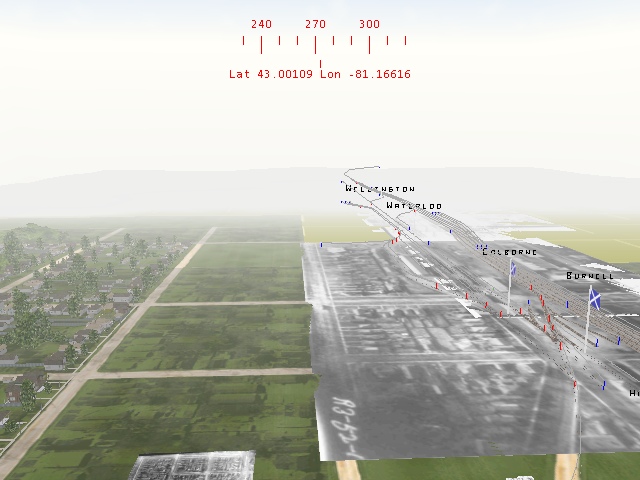
  • I use conventional markers to aid placement of the transfers (see the first pic above). I place a few markers at the major intersections and align the transfer to the marker.

I hope you find this helpful.

Wayne. (Visit my site: Building the L & PS)

Additional notes by Bob Jones:

  • Doug Cox, at USA photomaps, confirmed that 1 meter equals 1 pixel. I’ve been using the 500 x 500 meter photo images.
     
  • With USGS maps, using the 'meter scale' from the map’s title block, grid off the map as needed in paint, and go from there just like you have been doing.