Making Windows Which Light Up In MSTS Buildings
by Frank Carver

Overview

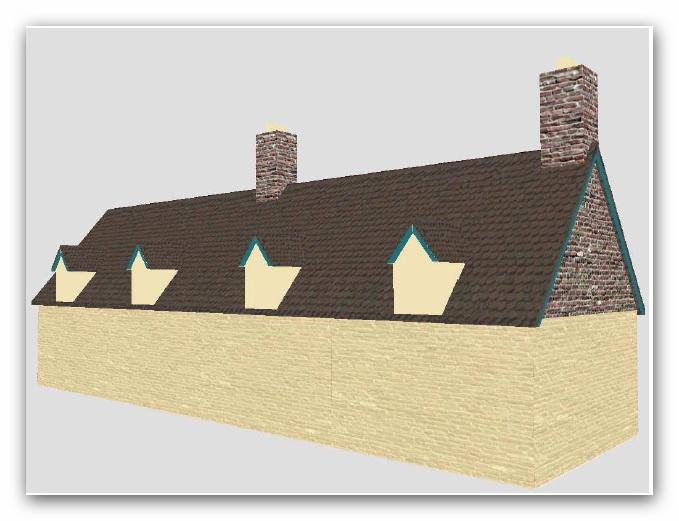
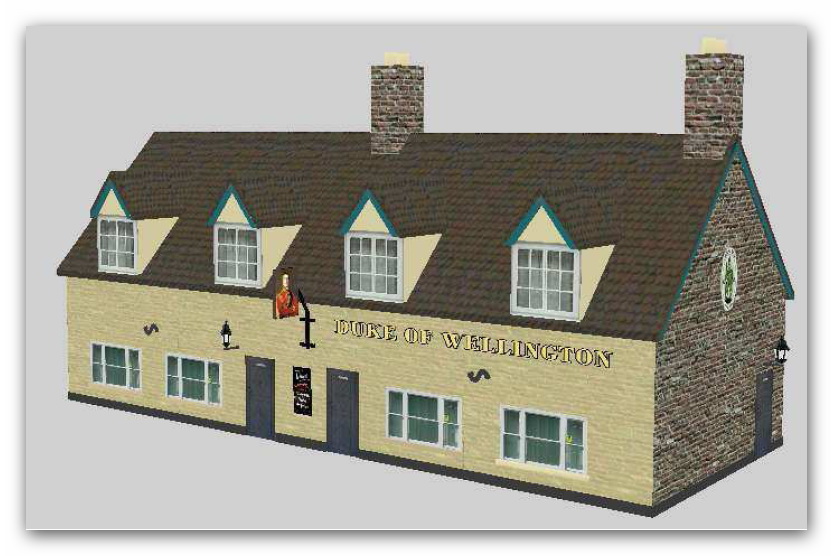
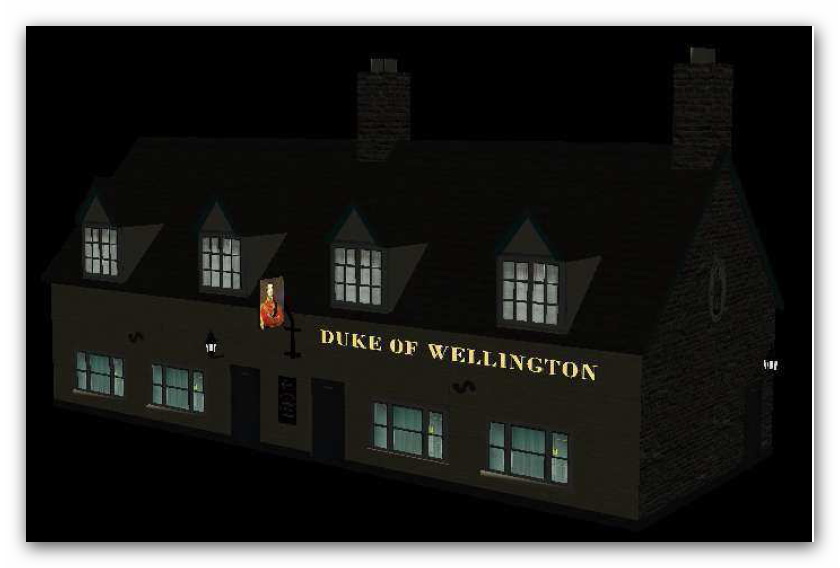
I have noticed that most routes are not black at night anymore, but are now mostly twilight, this being exaggerated by the use of LCD monitors and better graphic cards. This causes the original MSTS building to appear BLACK with lighted windows whilst driving in the Simulator.

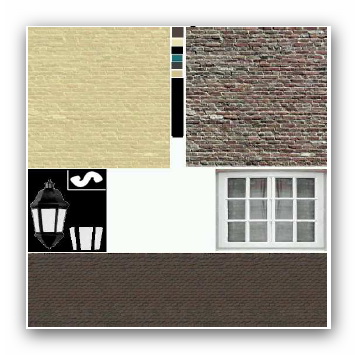
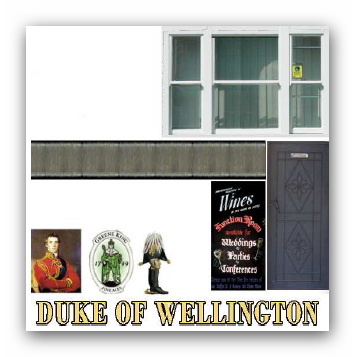
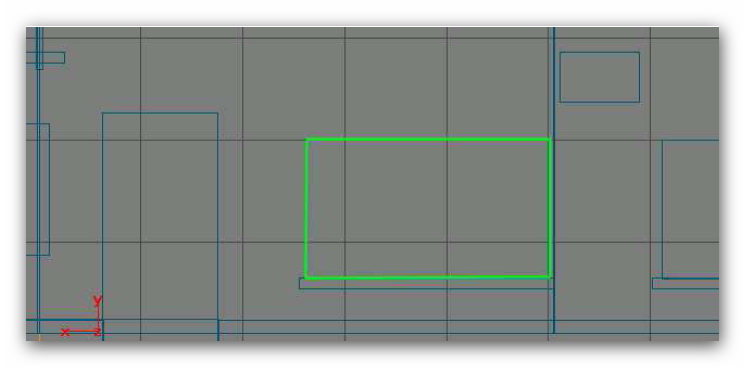
I decided to do something about it and I started experimenting and I can now write this tutorial on "Making Buildings in TSM" but I'm sure the same system would apply to other 3D programs. These buildings only have ESD alternative texture (1) in the "SD" folder if you require snow or (0) if no snow is required.

This system does increase the poly count of each model a little but I know they look better at night and can accept the higher poly count for this reason.


The Procedure

  1. First of all make an image in BMP or TGA for the building you want to texture, making sure all the windows and other required lighted items are separated from the wall and roof textures as all windows and some of the other items will be required to be made into an alpha:

  2. Make a basic normal building but without any windows and doors or anything else that require lighting at night as all these will be added as we go on with making this model.
    This building (below) was made up of four polygons on the front & four polygons on each end.
    The gable was made by pulling the two top polygons together.

    Each poly was textured in Poly Mode.

  3. After texturing this model the windows can be fitted.

    At the front of the building a new box can be made at say 2.3m x 1.3m x .01m so that the 2.3 x 1.3 facing you: this poly will be Solid Norm.

  4. Turn the building to the end mode and move the poly so that this window poly is just outside of the building wall.
    Place this box into poly mode delete the rear/ sides/top and bottom polygons, just leaving the one front polygon.
    This polygon can now be textured as a window and is better textured in texture mode. This window is then copied and pasted.
    In Move mode move this copy one movement outside of the Solid Norm window as in the picture below.

    Open the Current Item Properties and in Material change this copied window to Trans Hlfbright.

    You can now copy & paste these two window polygons to anywhere on the model you wish them to be placed, changing the window frame to your liking.
    Don't forget that the solid poly is next to the wall and the Trans Hlfbright on the outer side but exactly in place over the solid poly.

  5. This building can now be created and the created accompanying ACE files can now be imported into TGATools.
    Click on the "Create Alpha Template" tab: this will generate the pictures as shown below.
    Mark out the Window Panes/Glass and any other Alpha item you require with the Selection Tool or Magic Wand in your Graphics program as with normal night painting.

  6. Once these items in the pictures are marked, colour all visible items white and all others black; this will make only the window glass panes on the Trans Hlfbright item show in the model.

  7. After the alpha pictures are painted, they can be saved and exported as ACE files with TGATools to the folder where your model is. This will make a model as shown below.

  8. The item can be checked in Shape Viewer to see if the windows panes light up OK.
    Load the item in Shape viewer, click the Lighting Tab, then move the Brightness slider to the left and the Latitude slider to the right; the item should darken as in the picture below but any part that is Trans Hlfbright should light up or stay normal.

    `

    You will notice that the Pub Sign is lit up in the darkened model: that is because its fronts were ticked to Solid Hlfbright in the Current Item Properties; it does not require an Alpha as it is a Square Polygon.
    You can have just the two fronts of the sign lit by using the Poly Mode in your model maker; in the Current Item Properties just tick these Front Polys Solid Hlfbright and leave the Sign sides as SolidNorm.


Additional Notes

  • After the model is placed in your route in Route Editor (and while you are still in the Route Editor) press the + key on the keyboard: the sun in the simulator will go through its 24 hour cycle and the night windows will light up while the model changes to a dark shade of colour.
     
  • The ACE files for this type of building are not placed in the Night textures folder of your route as it will not work: it will not go completely black at night as it is controlled by the MSTS environment settings.
     
  • As this model is set at 1 in ESD_Alternative_Texture it still requires a snow image Ace in the Snow folder if required.
     
  • If you have a building you have made yourself, you can add some Trans Hlfbright window panes as above, change ESD alternative Texture to (1) in the .SD file of your model and remove the ACE file from the Night texture Folder.