Passenger Views in MSTS - The Definitive Tutorial
by Yuri Sos

Overview

The Passenger View is the viewpoint the player has when he presses the "5" key in the simulation. This view can be of the inside of a carriage or van or can be used to simulate an external view such as the view of a shunter from the loco steps, or a brakeman standing on the rear platform of his van or caboose. If you have more than one carriage with a Passenger View in a consist, only the first carriage with the PassView will display a cabview (this applies to a default MSTS installation: MSTS-Bin allows more than one Passenger View per consist).


Description

The Passenger View calls its own shape that is used for that camera view. In the case of the four default Passenger Views (Orient Express bar car, Kiha railcar seating, UK Second Class Passenger Carriage and US2 caboose), pressing "5" calls a highly detailed shape that is used in the simulation.

For example, the Orient Express parlour car view (complete with rotating fans and wafting cigar smoke):

the Kiha31 passview (also a version with red seats):

the BNSF US2Caboose view:

and the UK Mk1 Carriages view:

(Right-click | View Image in Firefox for a larger version of these three images).

When you look at the shapes that are used by these Views in Shape Viewer, they look like this:

the Orient Express parlour car view:

the Kiha31 passview (also a version with blue seats):

the BNSF US2Caboose view:

and the Mk1Carriages view:

No external walls, no wheels/bogies, just a highly detailed model designed to be viewed from one position within the model. These are 3D models that are created in the same way as other models for MSTS: however, as they are static as far as the sim is concerned, you can make them as detailed as you wish without incurring a great hit on frame rates. Windows should be transparent so that you can look out at the passing scenery. You can even include animation within the model (note the rotating roof fans and the wisp of cigar smoke in the Orient Express parlour car). A dedicated passenger view shape requires the shape file (.s) and the texture (.ACE) files for that shape. You do not require an .SD file.

If you don't want something so elaborate, you can use the wagon shape file as the shape for the sim to use: this can be quite successful if you are trying to simulate a guard leaning out of his van window, a brakeman on the rear porch of a caboose or even a shunter's view standing on the step of the caboose. Generally using the wagon shape results in a much less detailed and more jagged view of the wagon. If you do use an existing shape, the shape will need to have an interior or you will only see scenery.

Here's an example of a railcar that's been constructed with an interior: the Passenger View here is positioned in the the actual railcar shape (right-click | View Image for a larger view):


You can also use a shape that has no interior at all: here's a guard's van (which has no interior) with a Passenger View simulating the guard looking out his side window.


Defining The Passenger View In The Model's WAG File

The Passenger View needs to be defined within the WAG file of the model. It is in the format

	Inside (
	PassengerCabinFile ( filename.s )
	PassengerCabinHeadPos ( x y z )
	StartDirection ( x y z )
	RotationLimit ( x y 0 )
	Sound ( "soundfile.sms" )
	)

and is usually found towards the bottom of the WAG file near the Sound () line. Be sure to have an opening and closing bracket correctly placed. You may copy and paste the code contents.

The contents of the Inside() module are:

  1. PassengerCabinFile ( filename.s ): this is the name of the shape that MSTS will call when you press the "5" key. You can use the shape of the wagon itself or you can use/construct a dedicated interior view to be used with the engine or wagon. A dedicated interior view needs no external walls, animation, wheels, physics etc and thus can be as detailed as you can make it.
     
  2. PassengerCabinHeadPos ( x y z ): is self-explanatory: it defines the position of the head (ie camera) relative to the origin (centre) of the shape you are using: the units are numeric values in meters.
    • x - right (positive) or left (negative) of the origin of the shape;
    • y - above (positive) or below (negative - never used) the origin of the shape;
    • z - in front of (positive) or behind (negative) of the origin of the shape.
  3. StartDirection ( x y z ): provides the initial direction the camera (your view)is pointing when you press the "5" key. The parameters x, y, z are numbers (between -180 and +180) in degrees where 0 is straight ahead and
    • x is view up (negative) or down (positive) in degrees from the initial eyepoint ;
    • y is view left (negative) and right (positive) from the initial eyepoint (so left is -90, right is 90, rearview is 180);
    • z is view as if you have a head tilt (positive you tilt your "head" right, negative you tilt your "head" left; this z value is probably best left at 0 (zero).
    Rotation Limit ( x y 0 ): determines how far left, right, up down you can rotate your view using the arrow keys. The x, y values are numbers (in degrees) between 0 and 360 that determine the angle the camera will move away from the StartDirection view on either side.
    • x is view rotation up or down in degrees from the StartDirection;
    • y is view rotation left and right from the StartDirection;
    • Last number is unused, so leave at 0 (zero).
    Sound (soundfile.sms): This line calls the SMS files that determines the sound you will hear in the Passenger View: in the case of the Orient Express, you hear a piano playing, in the case of a caboose, you may wish to hear the locomotive working, depending on how many wagons there are between loco and caboose. Sound files are outside the scope of this tutorial, but make sure that the SMS files have a "Activation ( PassengerCam() )" line to ensure that the sounds will be heard when in key "5". Have a look at the oebarpas.sms file in the SOUND folder in the 380 folder to see how it's structured.


The UK Mk1 Carriages Error - A Case Study in Error Correction

The Mk1Carriages were supplied with the MSTS v1.2/1.4 upgrade. The passenger view is quite nice, but there is an error in its positioning. I thought I'd present this one as an example of how you sometimes need to look deeper into a problem.

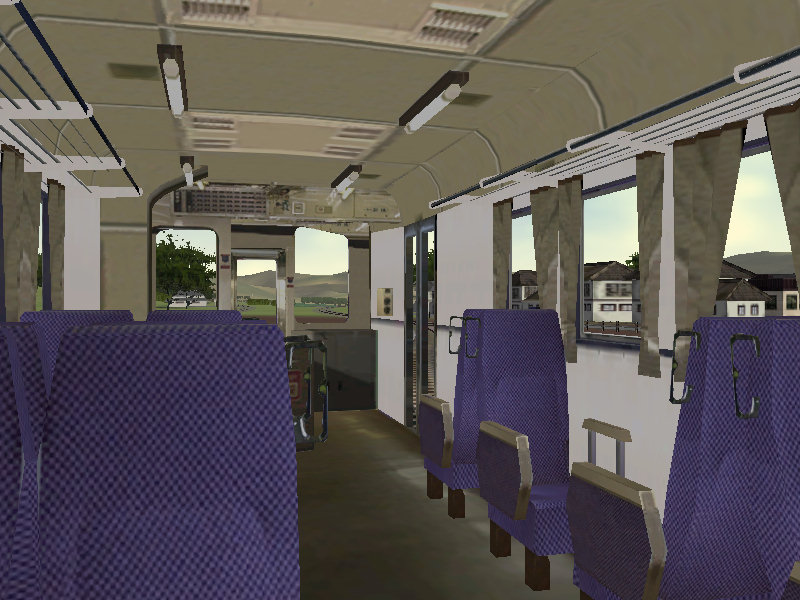
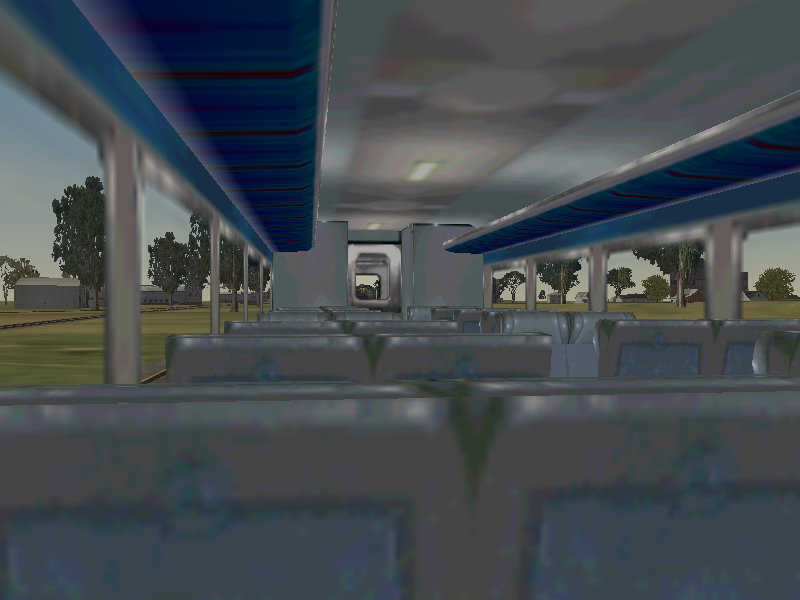
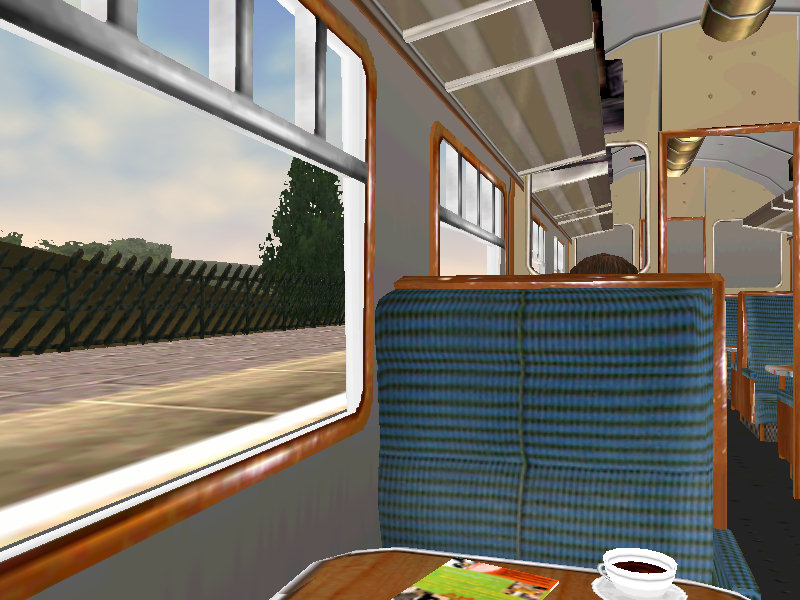
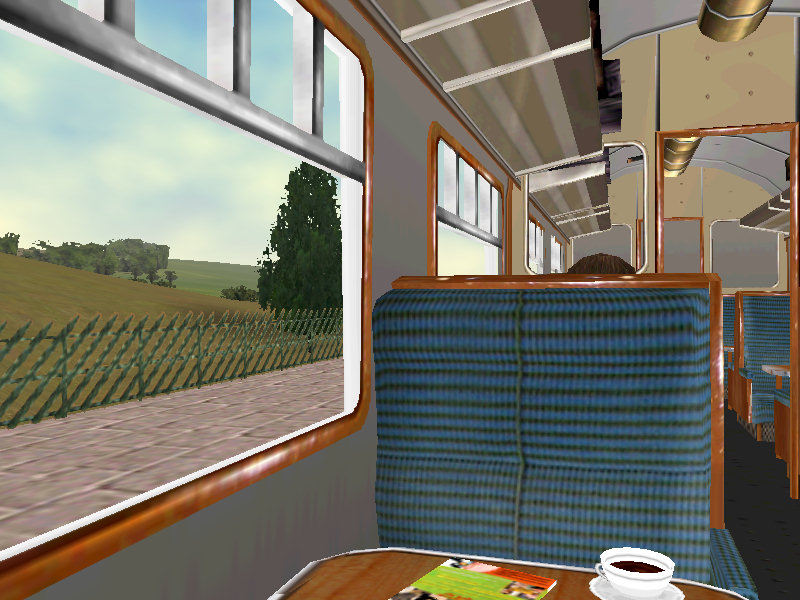
Let's look at the default Mk1Carriages passenger view (here shown at Horton-In-Ribblesdale station on the Settle-Carlisle line).

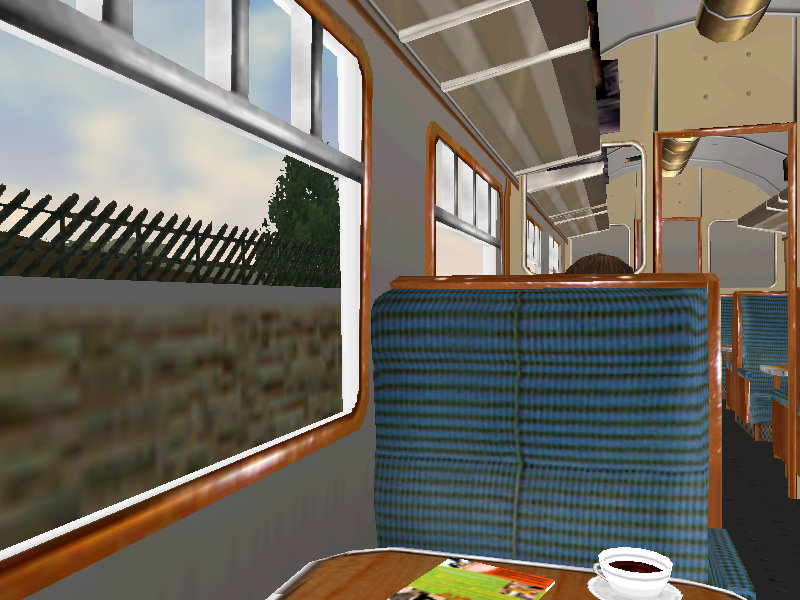
As you can see, your view is in the correct position relative to the seats and window, but, oh dear, as you look out the window you are staring at the side wall of the platform. Obviously the view is too low. BUT, and it's an important BUT, the view is basically correct. So this means that the passenger view shape you are looking out from is not positioned correctly.

Well this looks a simple repair, doesn't it?

Your first reaction might be to alter the PassengerCabinHeadPos parameter for height: ok let's do that for starters. Open the "uksecond.wag" in ConTEXT or similar unicode-aware editor and scroll down to line 42. Let's adjust the "y" parameter from 1.47801 up by, say, 0.85m and make it 2.33m. Forget about the numbers beyond the second decimal point and make the line read PassengerCabinHeadPos ( -0.61 2.33 0.11 ).

Save the file and look at the view in the sim. Ooops! Now we've got our head in the luggage rack and the platform outside the window is still too low.

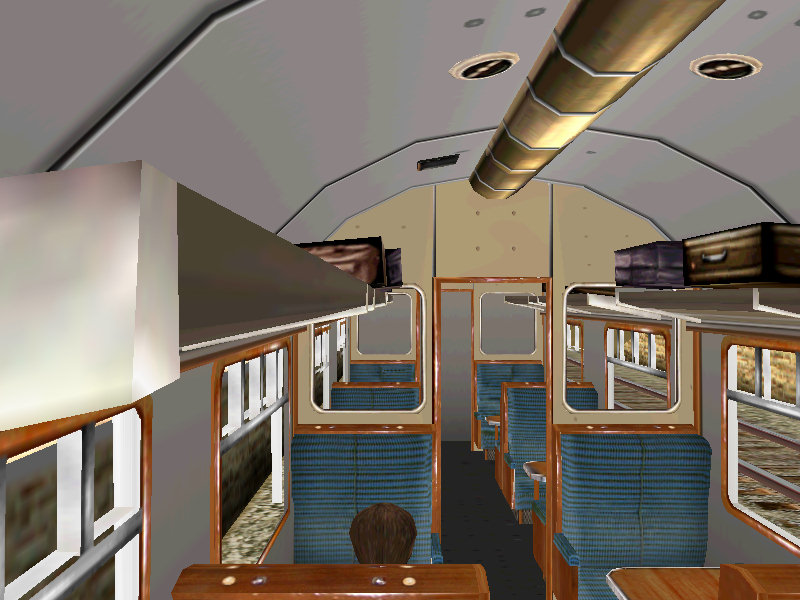
So that's not the solution we were looking for.

What's happening here?

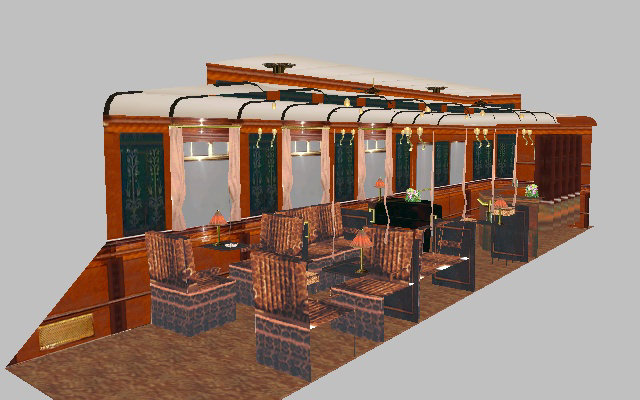
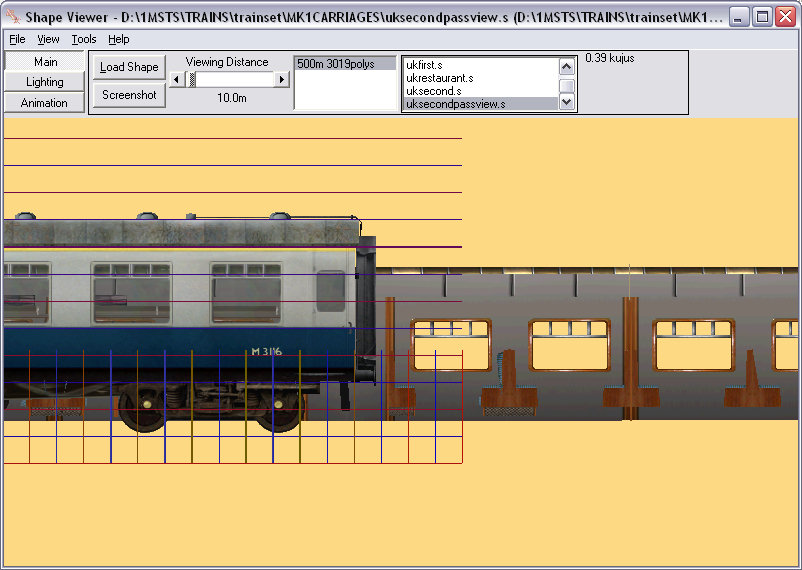
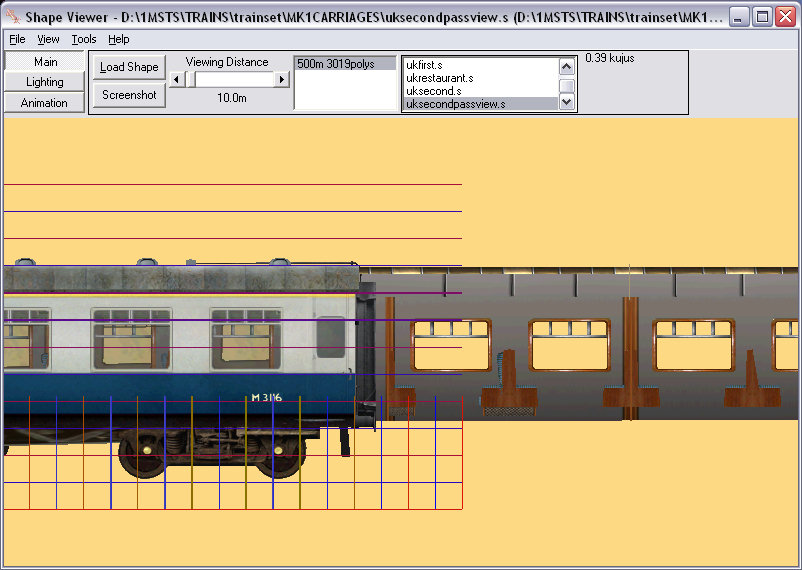
The answer lies in the position of the shape used to construct the passenger view. If we look at the passenger view shape in Shape Viewer and add the carriage as a second shape (press F3), you can see that the passenger view is too low when compared to the passenger carriage itself.

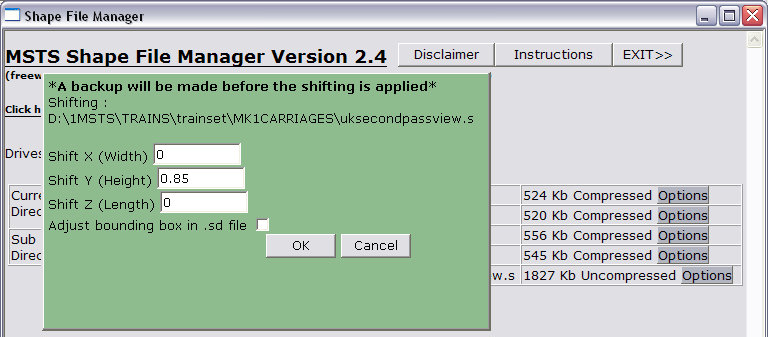
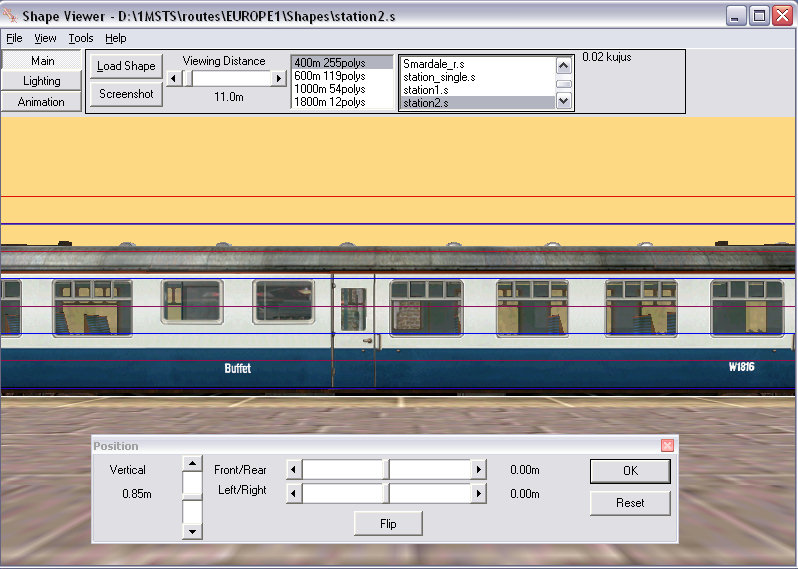
We need to correct the position of the shape relative to the origin. To correct this error, uncompress the uksecondpassview.s using Zipper, then open the shape file in Shape File Manager. Mouse over "Options" and select Shift.

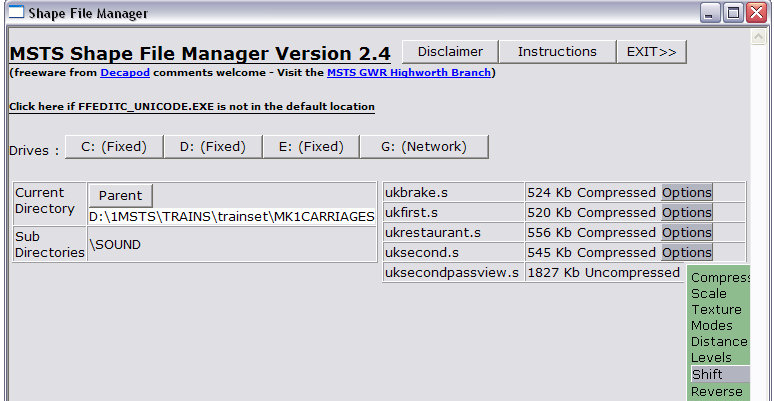
In the dialogue box that opens, put "0.85" in the "Y" box (this means we are shifting the shape upwards by 0.85m (I picked 0.85m after looking at the difference in the height of the shapes using Ian MacMillan's measuring tool).

Let's look at the two shapes again in Shape Viewer: Now the windows line up perfectly.

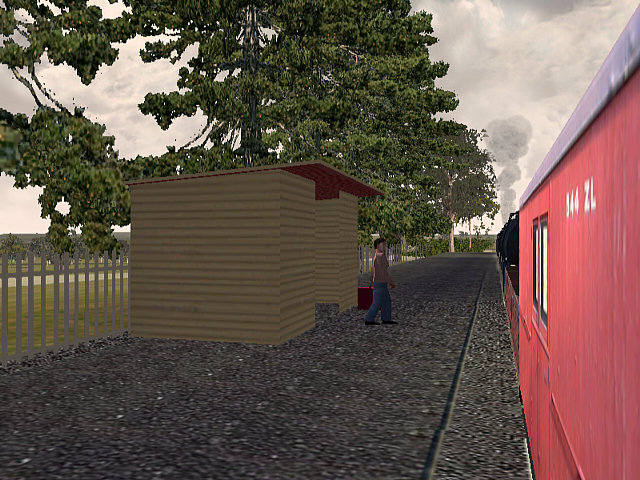
And finally, we look at the result in the sim: the platform is now visible outside the window, although the platform still seems high.

This seems a little odd as we know we've lined up the passenger view in the coach perfectly. There's obviously some other issue that's causing the passenger view to look low. Maybe there's another problem that doesn't have anything to do with the carriage.

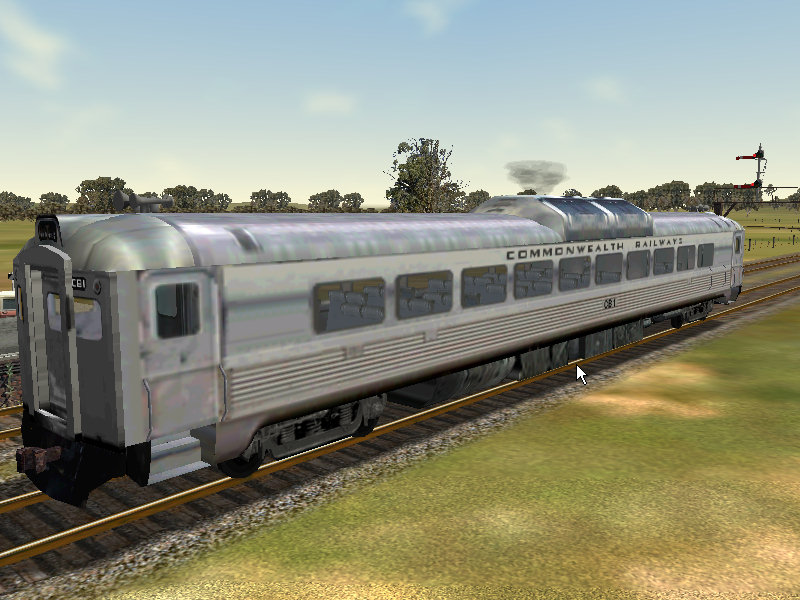
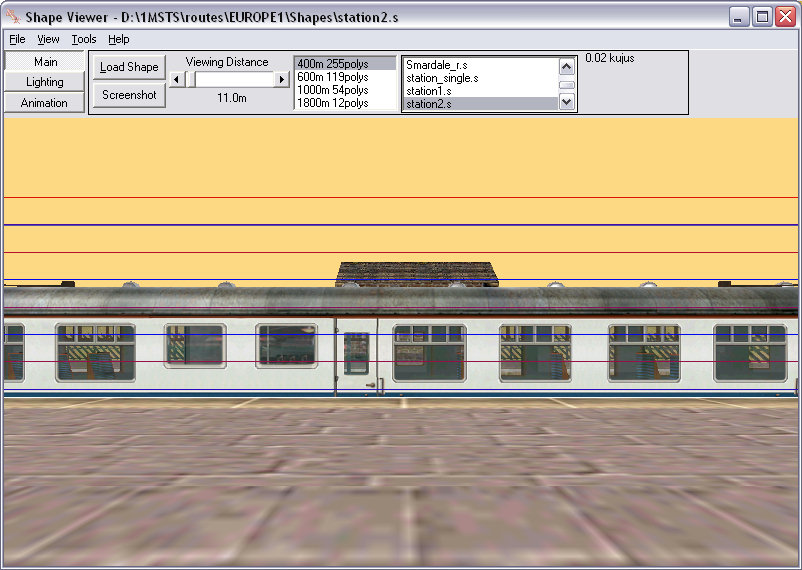
It's time to look at the station shape as well as the passenger shape. When we examine the train at the station, we can see that the platform seems a little high when the carriages are alongside.......

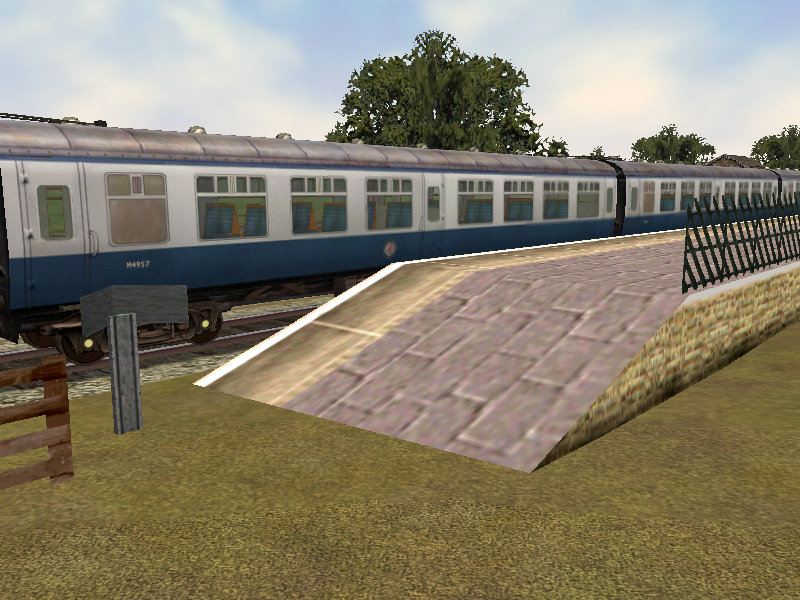
..... and looking at the carriage and the station shape in SView confirms that the platform is too high for the coaches:

Adjusting the coach by 0.85m (there's that number again!) and the doors now clear the platform edge in Shape Viewer.....

....and once you increase the height of the shape and the height of the passenger view by another 0.85m, the view out the window looks just about right:

The extra shift upwards has fixed the passenger view for the stations on the Settle-Carlisle, but may now be too high when the carriages are used on another route with correct height platforms. It would then be your choice as to whether you create a separate passenger view for your carriages to use on other routes with platforms at the correct height, or go into Route Editor and push down the station platforms on the Settle-Carlisle by 0.85m.