How to Make an Alpha Channel Using Paint Shop Pro and TGATool2
by Paul DeVerter

A Port City Car Co. Project Copyright © 2004

Overview

I have had great difficulty in making see-through windows, and other alpha channel objects for Microsoft Train Simulator. Mostly, it has been a problem of understanding the steps involved, and then understanding exactly what needs to be done in the Paint Shop Pro program. So, I finally decided that I was going to conquer the problem, and stick with it until I could get it to work properly.

This tutorial assumes that you know how to use Train Sim Modeler, or another 3D modeling program, and also how to make elementary shapes with Paint Shop Pro. It also assumes that you understand the concepts of BLACK resulting in a transparent structure, and WHITE resulting in the underlying colors or textures showing through.

We are going to make a simple static object, which consists of only two parts - a base and a wheel. And the textures are likewise going to be relatively simple, although it took me some time to make the wheel, and paint on the spokes, etc. But, the project is complicated enough that you are going to have to make several selections, and have a reasonably complex alpha channel, when you are done. We are not going to use the mask arrangement at all. Instead, the alpha channel is going to be generated solely by using the Selection menu, and you won't even have to fiddle with the various levels of transparency. But after you get the hang of this, then you can go back and experiment.


The Project

The project is a relatively simple static scenery object. It consists of a concrete base, set in the Earth, and a large automobile tire set on top of the base. If you wish, you may letter the base with a sign, like: We Fix Flats, or something similar. The wheel has a rubber tire and a spoked hub to hold the tire. The spaces between the spokes are the subject of the alpha channel, and they will become invisible, so that you can see through these spaces, just as you could with a real wheel.

Here is the finished project:

pdv_alpha1_image001

Notice you can see through the center of the wheel.

I am going to assume that you know how to make the necessary TSM parts, and likewise know how to put objects into your route with Route Editor. Also that you know how to make the textures as bmp files, and how to texture the model. We are going to skip lightly over the TSM part, and how to make the bmp texture file. Most of the time will be spent in the construction of the alpha channel. Then, we will go back to the TSM project, and make some corrections, and create the MSTS static scenery object.


Construction Begins

The Base

The first thing to do is make a base. Use the box tool, and shape it to suit your fancy. I made this about 5 feet wide, 3 feet high, and 1 foot deep. I arranged the origin so that it was up from the bottom 1 foot, so that normally 2 feet of the base will extend above the Earth. Why? So that you can mount the base on uneven or sloping ground, and you will not have part of the foundation being above the ground. Use SolidNorm for the material. Then texture the base, and put a sign on the front and back advertising your service station: FLATS FIXED, or what ever you may choose.

The Wheel

The final part is the wheel that is held up by the base. I used a tube that was 2 feet radius, and 7 or 8 inches thick, structured on both sides. Since it is round, I used polygon smoothing, and since it will have the alpha channel on it, make the material TransNorm in F2. Now, texture the wheel with an ordinary bmp file. BMPs do not handle the alpha channel, but we are going to fix that momentarily. The object now is to make sure that the wheel looks OK. See below in the section "The BMP and Alpha Process" section for a reference to the bmp file I used to texture the whole assembly.

The Assembly

After you have made the two parts, and textured them, or even before you texture them, you need to remove unnecessary polys, so as to make the object easier on your Simulator. Here is a front view of the assembly:

You may remove the bottom of the base, and also the portion of the tread of the wheel that is buried in the base. I was able to remove two polys here. Here is a view looking upwardly from the base, and you can see the polys mentioned are gone:

You can also see through the inside of the base, as though it were not there, because you are looking at the back side of the polys, which are not textured.


Housekeeping 1

It is time to do some housekeeping, and make sure you know where your files are so that you can find them again. I like to place all of my project files in one place, and that includes the TSM dst files, BMP files, TGA files, JPG files of textures from the WWW, and the like. I create a project folder, and sometimes when it gets crowded, even subfolders. I put them here: C:\Projects\FixFlats. Your names may vary.

It is also time to think about the ultimate names for the ace files when they are created, as well as the .S and .SD file names. If the name you remember this project by is FixFlats, then it makes sense to save the TSM dst file as FixFlats.dst. As you create .BMP files for the textures, it likewise makes sense to call them FixFlats1, 2, and 3.bmp, or something similar.

You will need a long and short name for the project, such as FixFlats. This has the added benefit of helping when TSM creates the .S, .SD, and .ACE files, as they will also begin with FixFlats. When you need to find the files in the Route Editor, in order to revise, remove, or otherwise, they have a common thread.


The BMP and Alpha Process

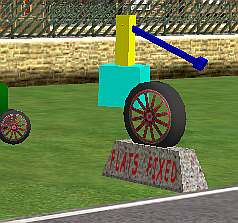
Make your BMP for the textures. Here is what mine looks like and you may use it if you so desire. It is a simple single layer bmp made in the PSP7 program. Click on the image to save a ZIP file containing the BMP: It is a 256 x 256 texture and probably could have been made even smaller.

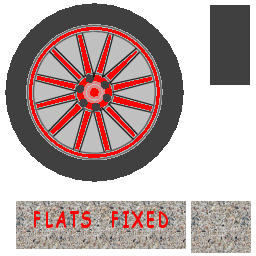
The wheel texture took several hours to make, and there is no particular reason for the colors. I just continued to hack until I got something that looked reasonable to me. Learning to make concentric circles was a chore and so was drawing and coloring the spokes. Save your work.

Now we are going to begin the process of making the alpha channel from this bmp. You may think that you can only make an alpha channel from a tga file, but I found that you can work with a bmp file in PSP7, through the point of saving the alpha channel, and then convert the whole thing to a tga file, without difficulty. The only tool we are going to use is the Selection tool.

Lets begin with the Magic Wand tool. It is located on the tool bar and looks like a magician's baton. When you click on it, the Tool Options window can be opened to give you some choices for how the Magic Wand will operate.

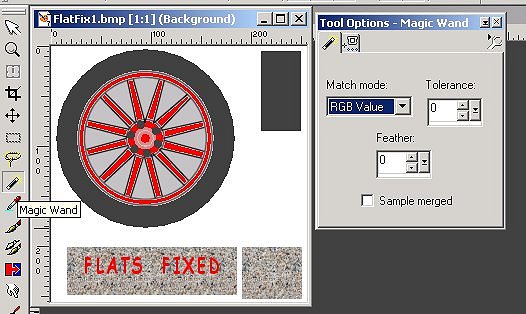
Since the bmp has a consistent background color of gray between the spokes and these are the areas you wish to become transparent in the Sim, they are the ones to be "alpha"ed out. Choose RGB Value for the Match mode, and the Magic Wand will focus on the first color you select. Or at least that is what the PSP Help file says. In fact, I found that it does not seem to matter which Match mode you choose - you get the desired result as long as you click in the proper areas. Set the Tolerance at 0 so the selection will stick with the exact color, and the Feather to 0 so that the selection sticks close to the line. These two numbers appear to be critical for our purposes. Move the cursor to any gray area between two spokes, and left click once. You will now see the marching ants (selection) about the area in which you clicked.

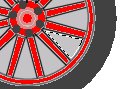
Then, place the cursor on each of the successive gray areas about the hub, and holding down the SHIFT key, continue to left click until all of the areas between the spokes are selected. We have just selected all the areas that are to become transparent.

Now, comes the mysterious part. We must invert the selections.

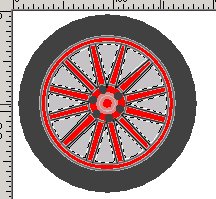
Go to the Menu bar at the top and click Selections | Invert. This will add a selection or marching ants about the outside of the canvas, and keep what appear to be the same selections about the gray areas. The selections about the gray areas are now really between the gray areas and the outer canvas selection. Look for the line of marching ants about the rim of the canvas, as well as the previously selected gray areas, as shown in the next photo. After you see this, you are ready to make the alpha channel.

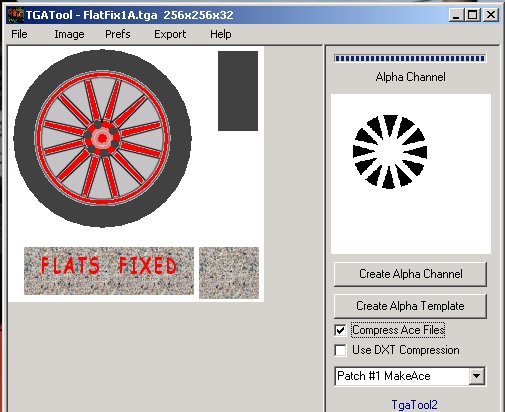
Go back to the Menu bar, click Selections | Save to Alpha Channel. The "Save To Alpha" window opens. Note it has a preview of the alpha channel you are about to save, and notice that the areas between the spokes are black - which means transparent - and the rest of the channel is white - which means the original colors on the main file will show through, i.e. they are not masked out.

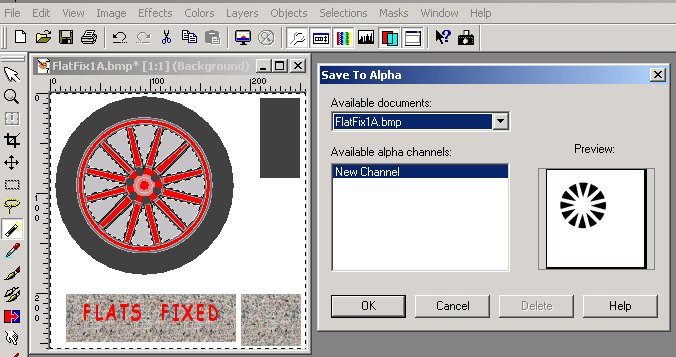
This is just what we wanted. Click OK, and this will result in a still further window appearing. It is called New Channel and it allows you to pick a name for the alpha channel, in case you ever want to use it again, or use it in another project.

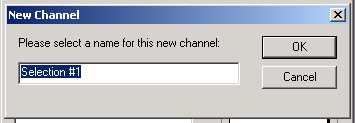
You probably won't, so simply click OK, thus choosing the default name, probably Selection #1.

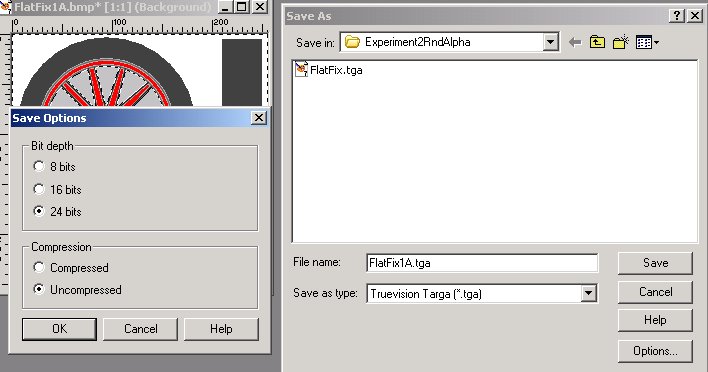
After you have Ok'ed your way out of these boxes, you are now back to the scene 2 photos ago, which is where you had inverted the selections. It is now time to convert and save your texture with the alpha channel, as in the next section.


Saving the Alpha Channel (and changing to a TGA file)

Since the BMP format will not save or include an alpha channel, we must save the texture as a TGA file which TSM also recognizes as a proper texture.

Go to the Menu bar, and click File | Save As. When the "Save As" box opens in the "Save as type:" go down to and select TGA. Pick a File Name that you like.

Do not stop here, click next on the Options button. This opens the "Save Options" window: here make sure to click 24 bits and also Uncompressed.

Click "OK", and you are back to the "Save As" window, so click "Save".

When you do, the extra windows will close, and you now have your TGA file with an alpha channel. If you look at the menu bar at what was the BMP texture, you will now see that it is named FlatFix.tga, or something similar.

The marching ants are still there and you need to remove them by holding CONTROL and pushing the D key. You should now save your work again, by going to File | Save. Do not forget to check the location. Your TGA file should now be safely in the Folder with the rest of the files pertaining to this project. You may close out of PSP. Your texture file with an alpha channel is now complete, and we are going to look at it in TGATool next, just to make sure.


TGATool2

Open TGATool, and then in the menu click File | Load. Browse to the folder where you placed your new FlatFix.tga file, and see what you have:

This looks good. We were successful in making an alpha channel with a minimum of work. We have two choices here. We can get out of TGATool without more, or we can go ahead and make an .ACE file, as a backup, in case something goes wrong.

I normally go ahead with making an ace file, and here is why. Sometimes TSM does not properly convert texture files to ace files that include the alpha channel. If this happens you can simply substitute the TGATool-made ace for the TSM made ace in the Route. Click on Export | Ace (Alpha) - not DXT, pick a name for your ace file, perhaps FlatFix.ace, put it in the Folder where you are saving the project files, making sure it is saved as an ACE Texture file.

If you were making a window pane instead of a wheel with spokes, you might desire to have the alpha not be fully transparent. Perhaps translucent. The way to do that is to send the alpha channel from TGATool to your drawing program, and then change the dead black alpha segments to something much closer to white - say a light gray, but this will have to wait for another lesson.

Now, back to TSM to change out from bmp to tga.


TSM and converting the Texture from Bmp to TGA

Assuming you previously textured the TSM object it would have been done using a bmp file. Since BMPs do not support an alpha channel, we must now either retexture the .DST file using the .TGA texture or we must convince TSM to convert over from the .BMP file to the .TGA file. This is easily done.

Make certain that the wheel portion of the project is set as TransNorm in the material box by pressing F2 and making any necessary correction. This would also be a good time to go into File | Project Properties, and click static scenery, and fill in the blanks for both long and short names, if you had not already done so.

On the TSM menu bar, click Edit | Convert Texture Filename. We are going to convert the texture file that this DST project is now using to a different texture file. This will work if you have not moved any of the portions of the main texture around to a different location: we have not.

Up pops this window: Change Texture Filename:

If you know the Current BMP texture Filename put it in the blank, otherwise press the "Browse" button and find and select the BMP file for the wheel. In the "New Filename" box type in the name of the TGA file that contains the alpha channel you just made, it is similar to FlatFix.tga, and press OK.

TSM will convert the .DST file so that it is now looking at the New Filename which is a TGA file with an alpha channel. This is a DOS process, so you are restricted to a filename having the 8.3 format. Notice that the process does not place the newly Filenamed file in the Textures Folder of the Route, but we haven't placed anything in the Route yet anyway, so we need not worry about this. If you had, however, you would need to make sure that the newly Filenamed file is located in the proper place in the Route. This is a very handy method to not only change texture file types, but also to change the name of a texture file to one that more closely relates to the long and short names of the project, without having to manually retexture the project, or attempt to change all the references in Part | Textures (F4).

The only thing left to do in TSM is to go to File | Create TS Object File and fill in the blanks. This would be a good object for the Clutter class. After the Conversion Report is generated, click File | Save, and close out of TSM.


Housekeeping 2

Now all that is left is to make a copy of the Conversion Report for your documentation, and then go to Route Editor and place and admire your new object with its see-through wheel.


Conclusion

You have now learned how to make an alpha file, so that you can have a transparent area. And this was done without fiddling around with the Masks section of PSP, and being thoroughly confused with the terminology and red colored masks.

Credits and Thanks to:

Tim Muir, Ted Ahner, Ed Hawkins.

Links

I have attached the BMP file I used, in case you wish to use it. The font used in the lettering of the base was Comic Sans MS. The dst file is so simple, you should have no trouble making your own.