More Tunnel Tips
by Jim Steven and Jim "Sniper297" Ward

Overview

Read Creating Tunnels in MSTS for an overview of creating tunnels.

Quick reference summary:

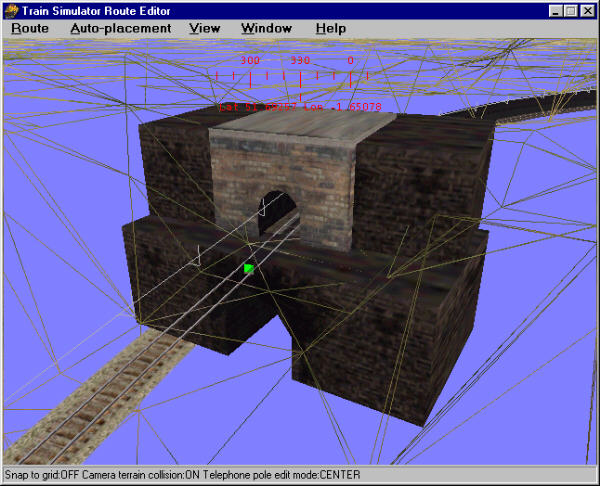
  • Punch a hole in terrain with the "V" key;
  • Place tunnel portal;
  • Hide hole with transfers.


Creating Tunnels - some additional pointers

This tutorial lists some extra points by two other authors that you may wish to consider.

  • The two items that make the process easy or difficult are the current tile setting for "Error Bias" and the overall map setting for "Detail Scaling Factor".

    If Error Bias is not zero, you end up with large triangles. If the Detail Scaling Factor is not small enough, you also get large triangles.

  • Align the route track with the terrain using the WIRE FRAME mode. It's important to get the track lined up with a texture triangle's vertex to avoid needing to carve large regions from the terrain using the "Vertex Key" in the route editor.
     
  • Use wire frame to align the horizontal area below your track so it's flat. If you don't do that, you'll find it hard to cover the white hole that remains.
     
  • Use the Terrain Transfers to patch the hole - but as it says on the MS Site: Terrain transfers directly lower FPS - so use them sparingly.
    • Transfers start as 1x1 objects, so place them on terrain you can see so they don't hide below the terrain. ("inside the tunnel");
    • Pieces should be sized rectangular and you'll learn one configuration of width/height retains the texture better than the other;
    • Transfers have a side that fades out into the surrounding terrain. That side goes outward;
    • Turn on Wire-Frame mode to see how the terrain and track line up with each other. Try making the patchable surfaces as flat as you can. When you overlap transfer pieces, they cause white flashing of the textures as the different "alpha" layers are calculated. (Transfers are "TGA" files with transparencies);
    • Use the keyboard keys to rotate or move those transfers too. Less frustrating than a mouse. Line your camera view up so you see inside the tunnel;
    • I would also set the tile's Error Bias to ZERO instead of the default so the texture triangles are easier to manipulate;
    • Another thing that helps with the mountain is to use Wire Frame mode only to set heights. You have many times more control over the terrain than when the texture is on screen.

Jim Steven, MCSE, Senior Microsoft Windows Application Developer


Another Quick Tunnel Tutorial

by Jim "Sniper" Ward

Essentially it's just a matter of stacking tunnel entrances to hide overly large holes you've created with the "V" key.

The JP1singletunnel is the perfect size for single track, but it's too narrow outside to hide the gaps. The UKtunnel is wide enough outside, but too wide inside, so I combine the two.

Download PO&Nver5.zip and install it, open it in the RE and poke around, "reverse engineering" is the easiest way to figure out how somebody did something. In some places you'll see multiple tunnel stacks, vertically and horizontally, but by setting the terrain tool "cutting" to 55-65, "width" to 12, and using a temp piece of 10 meter straight track (moving it where you want and hitting Y to cut away terrain), you can adjust the slope where the V key makes the hole.

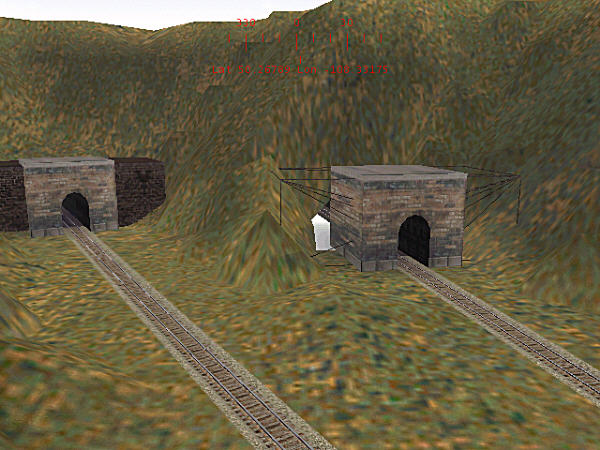
This shot at right was before I learned how to make the holes smaller. That's why it has a tunnel section buried in the ground, to hide the big hole in the ground under the tracks! I later used that to make "floors" for the engine sheds.