How to set up AI Lighting in MSTS Locomotives
by Yuri Sos

Overview

As you start to play MS Train Simulator (MSTS), you know that you can turn on or off the lights on the locomotives under your direct control (and usually the tail lights on the last vehicle on your train):  these trains are known as "player trains".

However, it becomes very frustrating as you play various activities that all the default trains coming towards you are unlit (see below).

MSTS was shipped with all locos only able to display lights if they were under the control of the player - all other locos in the sim ran through their activities with their lights off.

Surely the image below is preferable - note that, as above, the train approaching is not under player control - it is being controlled by MSTS:  these trains are called "AI trains", AI standing for "Artificial Intelligence".

The difference here is that the AI-train is fully lit with headlights and ditchlights operating as it approaches and passes the player train.

I'm going to show you how to activate or install lighting in locomotives that are not under your direct control - AI-lighting.


Text Colours Used In This Tutorial

Black: this text you are reading;
Green: snippets of original code found within the .ENG files you will be modifying;
Red: explanations of lines of code: do not copy these into .ENG files;
Blue: snippets of altered code you will be typing into the .ENG files.


Associating MSTS Files

If you haven't already done this, "associate" .ENG and .WAG files with a text editor: this means that whenever you double-click on a file with the extension .ENG or .WAG, it will open with that editor.

If you need to do this, click here for a new window/tab showing you how to do this using my favourite text editor, ConTEXT.And now to the part you came here for! ..........


Activating the AI-Lighting in Default MSTS AI-Locomotives

You will have noticed that there are several locomotives that came with your installation of MSTS that appear in activities but cannot lead player trains.  These are characterised by the absence of a Controller Handle symbol in front of the loco's name in Activity Editor (see lack symbol to the left of SD40 below):

These locos are known as AI-locomotives and are used in AI- (or traffic) trains in Activities. They usually lack a cab and thus also have simplified sounds.

These locomotives are:

  • Steam
    • 310
    • Pendennis Castle
    • Royal Scotsman
  • Diesel
    • Kiha 140
    • SD40
  • Electric
    • 30000
    • Genesis
    • Metroliner

Let's start with the Pendennis Castle.  This steam locomotive is located in the following folder:
\TRAINS\TRAINSET\PENDENNIS

Within that folder you will find Pendennis.ENG, the engine file that controls how the model will behave in MSTS. Copy it to a Backup folder outside your MSTS folders for safekeeping. Double-click on the .ENG file and it opens in your text editor. Scroll down and you will find section that starts Lights (.

At this point, it's useful to have the light settings open in MS Word (they're on page 2 of the How_to_Specify_Lights.Doc),
but the relevant parts are also HERE.

The part we're interested in here is the Conditions() parameter.

Conditions (
	Headlight ( 3 )
	Unit ( 2 )
	)

As it stands here, this particular light only comes on when the headlight is manually set to Full and the Unit is leading. But this is an AI loco, not a player train, so you can't turn on the lights, therefore you'll never see the lights on in the sim.

We're going to change this by using the following condition clauses:

Control ( 1 )
the player is NOT in charge of the loco (ie it's an AI train
Unit ( 2
Light on only if it's the lead unit
Service ( 2 )
the loco is actually on an AI train, not inert in a siding
TimeOfDay ( 0 )
lights are on no matter if day or night

So the Conditions parameter above is changed to look like this:

Conditions (
	Control ( 1 )
	Unit  ( 2 )
	Service ( 2 )
	TimeOfDay ( 0 )
	)

You can remove everything in green and replace it with everything in blue.

Repeat this for each of the four lights() specifications.

Let's do another quick change while we're here in the pendennis file:  For each of the Type ( 0 ) lights, scroll down to
Radius ( 5.0 )
and change it to
Radius ( 0.5 )

Save the file and quit.

Now do the same for the RoyalScotsClass.Eng in the RoyalScotsClass folder and 310.eng in the 310 folder.

Now load MSTS.  Pick an activity on the Settle and Carlisle and commence the activity. You will notice that the oncoming trains have their headlights on!

In turn, move to the sd40 folder, open sd40.eng and change the 9 lights as above.  Then also kiha41 and the others listed above.


Installing AI-lights In Locomotives That Are Normally Player Locomotives

This is where many great gains are to be made in the appearance of many locos in the sim as many player locos are used in AI-consists in various activities.  These changes involve getting "up close and personal" with the lighting section of the .ENG files, so be sure to make a backup to a folder remote to MSTS of any model you're planning to alter.

The structure of the Lighting section of the .ENG file is as follows:

Lights ( number_of_different_light_specifications
	 Light (
		comment ( description_of_light )
		Type ()
		Conditions ()
		Cycle (
		FadeIn ()
		FadeOut ()
		States ( number_of_states
			State ( define each state
			) <- bracket to close State
		)<-bracket to close States
	) <- bracket to close Light
	
Light ( next light
			) <- bracket to close State
		)<-bracket to close States
	) <- bracket to close Light
) <- if this was last light definition, brackets to close whole Lights Section
Sound ( locoeng.sms ) <- not always in this position
)<- bracket to close WAG section of ENGine specification.

This tutorial is about adding AI-lights, and not a treatise on the lighting section itself so I've intentionally gone light on the internals of each Light () definition.  I'm preparing a tutorial on Lights.

You have two choices when creating AI-lights:

1.   Add AI-Lights to a "Player Engine"
2.   Make an AI-copy of a "Player Engine".

Let's look at each in turn.


1.   Add AI-Lights to a "Player Engine"

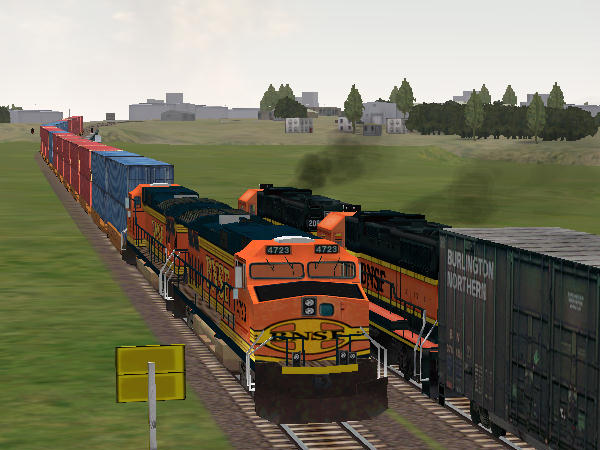
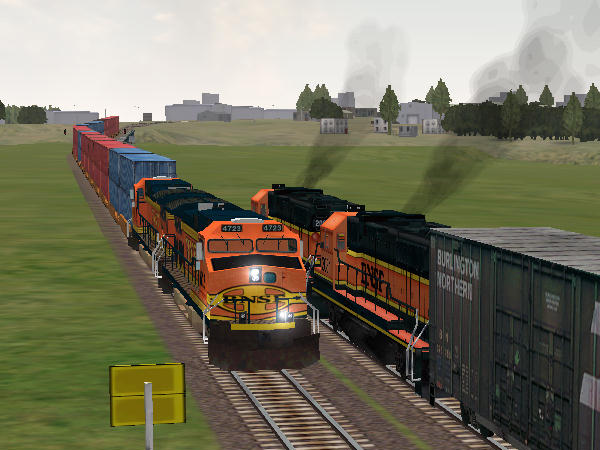
When you add an AI-light to your engine, the two most common mistakes (and I make both on a regular basis) are:

  1. not incrementing the number of lights at the top of the light definitions; and
  2. not copying all the brackets when copying a light () definition.

Failure to avoid either/both of these errors results in the infamous MSTS "phone home".

You create an AI-light in a player locomotive by copying the existing light definition and changing the conditions; you then increment the number_of_different_light_specifications (see above) by one.

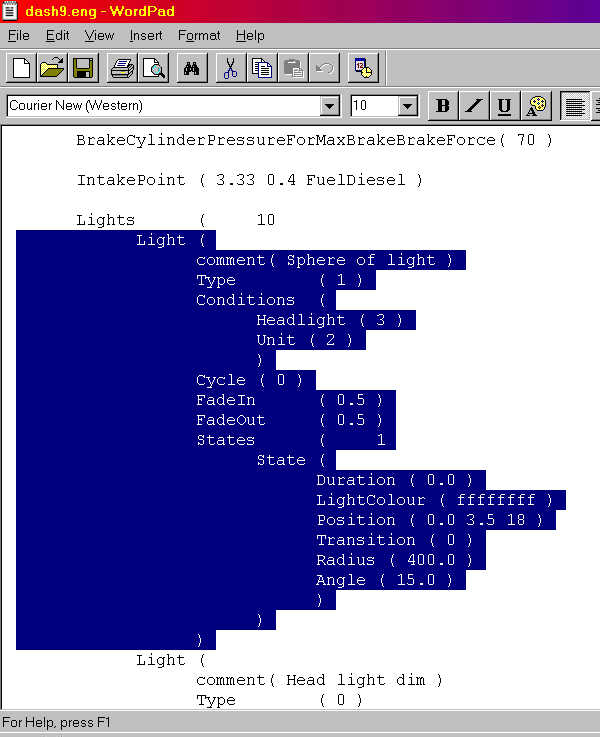
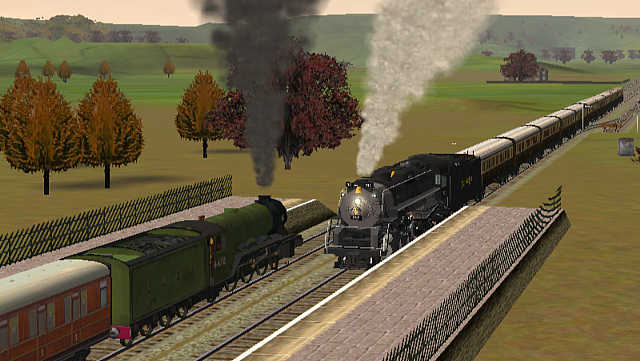
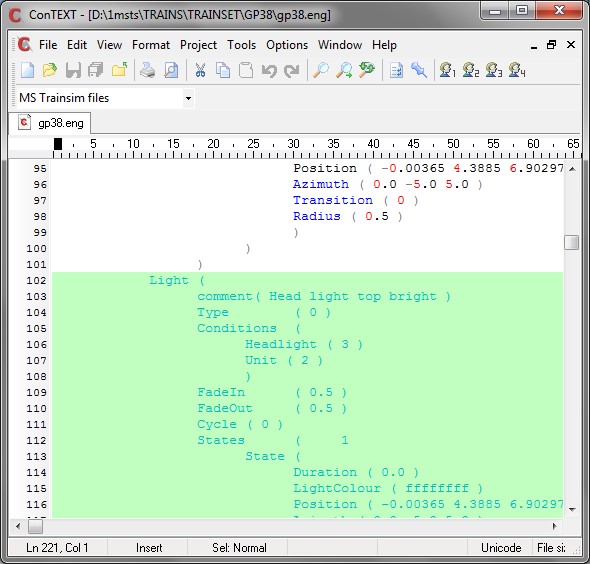
Let's start by using the GP38 as our working model. Open the gp38.eng file (now you HAVE made a backup first, haven't you?). Scroll down to the Lights section.

You will find
Lights ( 9
This tells us that there will be nine light definitions.
They are

  1. Sphere of light
  2. Head light dim
  3. Head light bright
  4. Head light bright
  5. Front right flashing light
  6. Front left flashing light
  7. Rear right light
  8. Rear left light
  9. Rear red light

For an AI locomotive, we really only need the headlights and the flashing lights, so we'll copy definitions 3,4,5,6 and modify those.

As I said before, it's so easy to mess up the brackets, so what I do is first create a demarcated space where the copied light definitions will go.

This is a snippet of code which crosses the boundary between the second-last and the last light.

<start snip>
	 Light (
		Azimuth ( -180 -180 -180 )
		Transition ( 0 )
		Radius ( 1.0 )
		)
		)
		)
		States ( number_of_states
			State ( define each state
			) <- bracket to close State
		)<-bracket to close States
	) <- bracket to close Light

Light (
	comment( Rear red light )
		Type  ( 0 )
 <end snip>

You can clearly see the three brackets closing one light definition, and the next Light definition commencing.

I move the cursor to the space between the definitions and type the lines shown in blue

<start snip>
	 Light (
			Azimuth ( -180 -180 -180 )
			Transition ( 0 )
			Radius ( 1.0 )
		)
	)


Comment ( ========= begin AI lights ========= >

Comment ( ========= end AI lights ========= >

Light (
	comment( Rear red light )
		Type  ( 0 )
 <end snip>

Now I scroll up to the first Light definition I want (Light ( Head light top  bright )

and I mark the block all the way down to the end of "front left flashing light" - ie I stop before going into the Light entitled "rear right light".

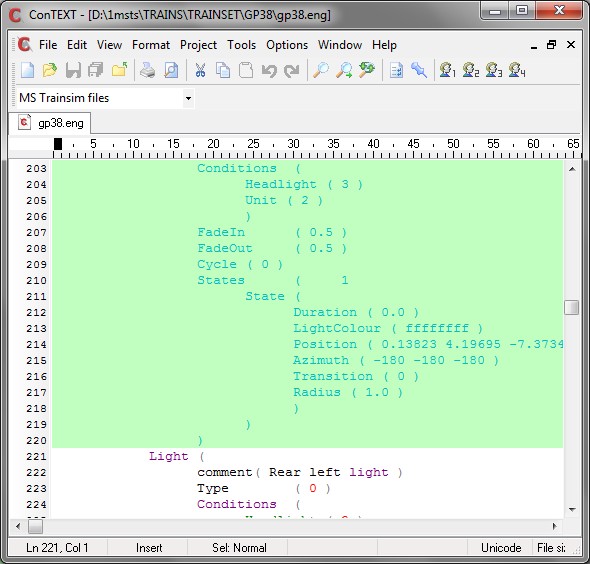
Make absolutely sure that you have marked the three brackets as shown in the screenshot above.

Now press Ctrl-C to Copy.Scroll down to the blank line between the two AI comment lines you created a moment ago and press Ctrl-V to paste the light definitions into this area.

Now it's a relatively simple exercise to replace the lines


	 Conditions (
		Headlight ( 2 )
		Unit ( 2 )
		)

in each of the four AI-light definitions with


	 Conditions (
		Control ( 1 )
		Unit ( 2 )
		Service ( 2 )
		TimeOfDay ( 0 )
		)

As you change each light, place an "AI" at the beginning of the comment line so that

comment( Headlight top bright )
now reads
comment( AI Head light top bright )

Finally, scroll up to the very beginning of the Lights section and replace

Lights ( 9
with
Lights ( 13

You can check your work by using ConTEXT's bracket-matching feature to ensure your bracketing is correct. You'll soon find out if you've made an error as MSTS will either crash on loading the sim, or on loading an activity!

Save and quit.   Now drop down to here to bypass reading about your second choice.


2.   Make an AI-copy of a "Player Engine".

This method involves copying the .ENG file of a player locomotive and converting it to an AI locomotive.  There are advantages to this method, the main one being that you can lower the light count in the AI locomotive.  It's been recently discovered that an excess of lights in an activity can cause some lights or even signals to "go dark". There appears to be a 72 "lights-per-tile" limit as some users have reported lights going out when an AI train approaches, then coming back on after the train has departed.

Step 1:We'll work with the Dash9 engine, but these principles will apply to all locos.  Open Windows Explorer. Click Copy, then Paste on Dash.Eng. Rename "Copy of Dash9.Eng" to "AI_Dash9.Eng".

Step 2: Open AI_Dash9.Eng in Wordpad or similar Unicode-aware editor.
Ctrl-F (Find) "cvf.
Remove the line that states Cabview ( Dash9.cvf).
Scroll to near the bottom and look for the line
Name ( "Dash 9 " )
Change that to
Name ( "AI Dash 9" )

Move up to the Lights section. You will see each Light specification starting under the line reading Lights ( 10.

You will be removing many of these light specifications. Examine each Light specification. You will see the format that starts with Light ( and ends with THREE closing brackets.

Let's start with the "Sphere of Light".  Look at the image below.

Note that the whole light specification has been highlighted, including the three last brackets.  Press "Delete".

Now remove "Headlight Dim".  Change the next two "Headlight Bright" specifications so that you replace Headlight ( 3 ) with Control ( 0 ) Service ( 2 ).

Rear bottom light, Rear Top Light.

Leave  Rear Red Light  but change to Control ( 0 ) Service ( 2 ) and change Unit ( 2 ) to Unit ( 3 ).

Now scroll up to the top and change "10" on the very first line of the Lights to "5".

Check your work, then save and quit.

Test your work first by creating a consist of "Dash9" + "AI Dash 9".  Make sure that the sim runs - you'll get an MSTS "phone home" if you've made an error.

Replace the Dash9 locos in your AI consists with AI Dash9.

Obviously there's only a saving of 4 lights here, but some models have over 35 lights, fine for the leading player loco but completely wasted on an AI engine (really, are you going to notice the steplights on the other side of the locos on an AI train you are passing in a loop?).


Modifying Rolling Stock For AI-lighting

Regardless of which choice you made above...........

Open MSTS, pick an activity and away you go.

The same procedure can be used for any MSTS loco, default or add-on.  One thing, though, the default Dash9 has 9 light definitions, but has 10 as the number of lights - obviously it works by sheer luck.  When you add the four AI lights, change the number of lights to 13, the correct number of definitions, and it will work correctly (as you can see by the screenshots in the introduction).

Note that the "beam of light" projected in front of a loco works only for player trains, not AI-trains.

You can apply the above principles to any locomotive: here is NALW's brilliant Berkshire converted to AI-lighting and running in activity on the S&C.


Modifying Rolling Stock For AI-lighting

By now, you're feeling comfortable with modifying the ENG file, so editing the WAG file will even be easier.

Open the .WAG file for the wagon you're interested in, scroll down to Lights:  most lighting parameters in wagons are for the End Of Train (EOT or FRED) red blinking light, or for marker lights for guard's vans or cabeese, solid red colour marker lights.

A typical light definition will be

Light (
	comment( Rear red light flashing when headlight dim )
		Type ( 0 )
		Conditions (
			Headlight ( 2 )
			Unit ( 3 )
	)

Simply replace

Headlight ( 2 )

with

Control ( 0 )
Service ( 2 )

and the marker light will be on regardless of whether it's a player or AI-train, as long as it's in actual service.