Creating Forests in Route Editor: Understanding the FORESTS.DAT file
by Jim "Sniper" Ward (contributions by Dave Nelson, Lukas Lusser, Joe Morris and Yuri Sos)

Forest 101

I thought I'd put everything I know about forest regions into a single tutorial.  First off, they're hard coded, so entering them in the .REF file only screws them up, you have to edit them in the FORESTS.DAT file, and they only show up in the RE object menu as "track objects" (?), no way to change the category.

Forest regions have no .S or .SD files - that's the part that's hard coded.  The Forests.dat is only used by the Route Editor - once you've installed a forest from the Route Editor it appears as an item in the World .W file.  This entry in the .W file lists the .ace file in use.

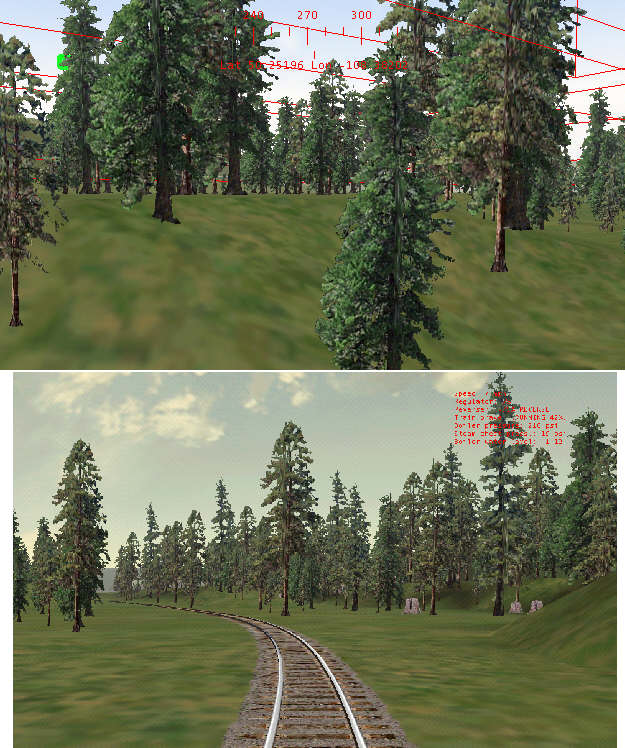
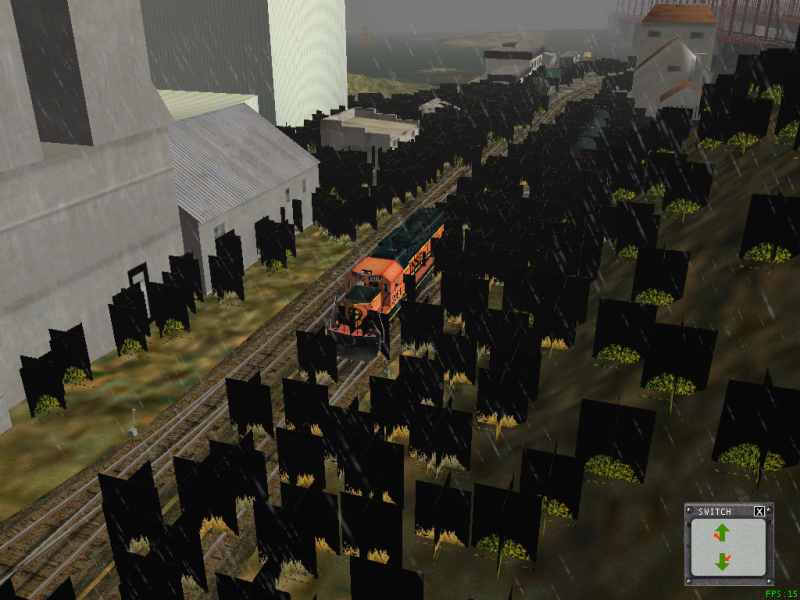
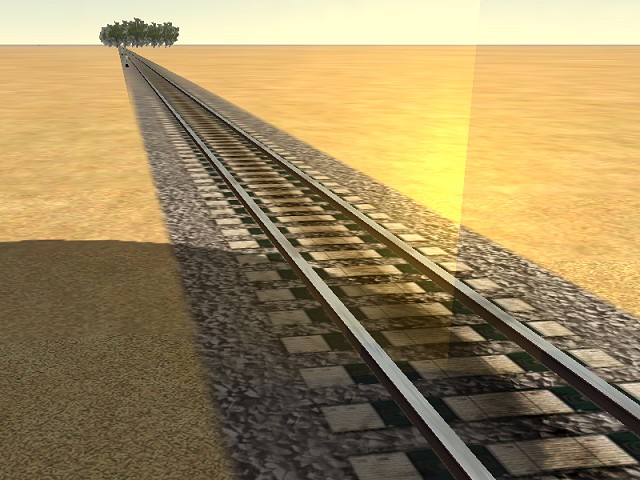
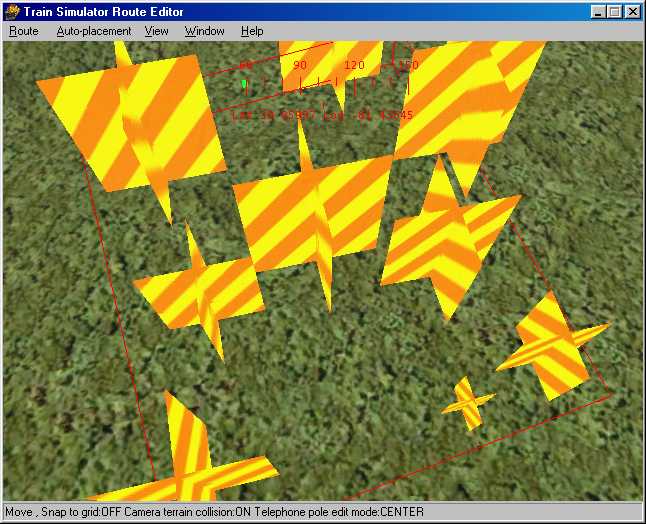
Whatever texture you apply will be a simple 2-dimensional cross shape:

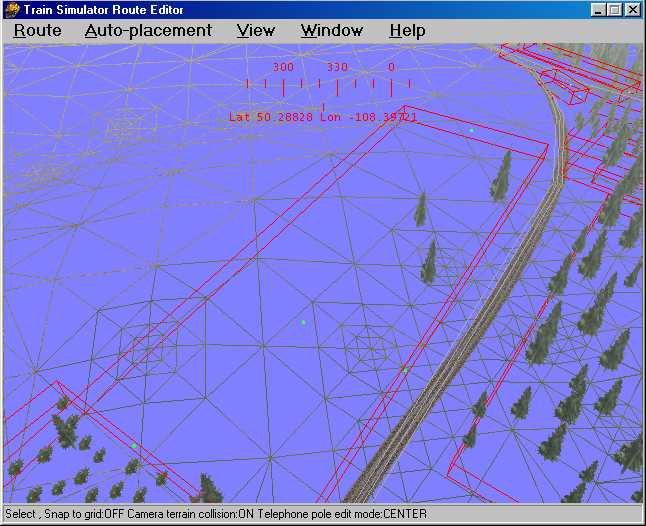
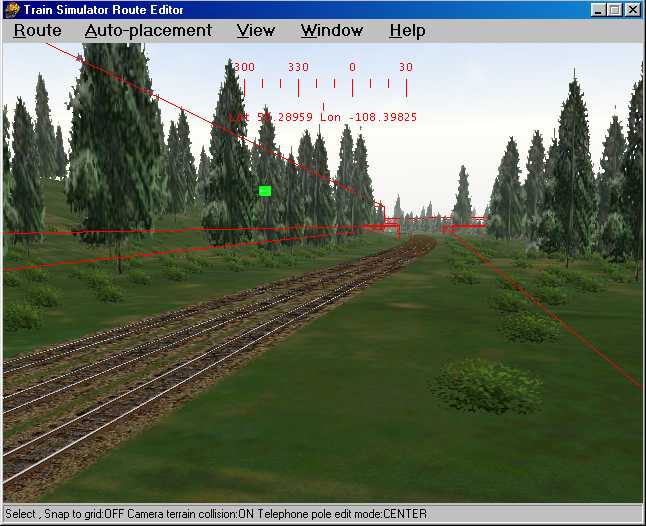
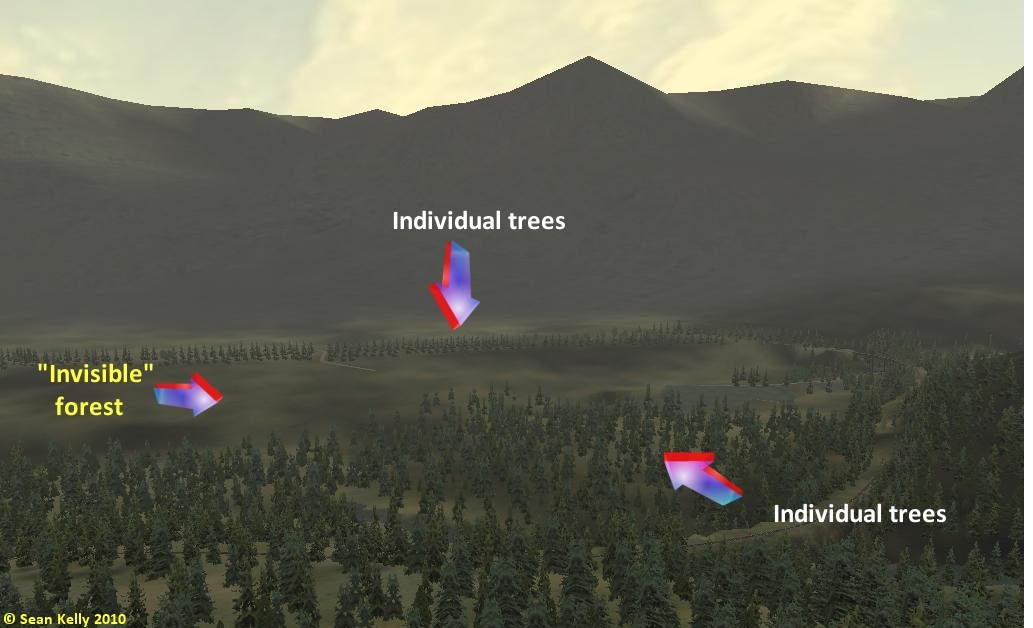
This has some obvious disadvantages,  It does default to ESD 252, so any ace file you use has to be copied to all the seasonal and snow subfolders to avoid error messages (the forests.dat file is hard-coded to use the seasonal folders), and it looks pretty bad close up, especially from certain angles, depending on which texture you use. The visible distance is problematic sometimes too, they have a tendency to suddenly pop up all at once.

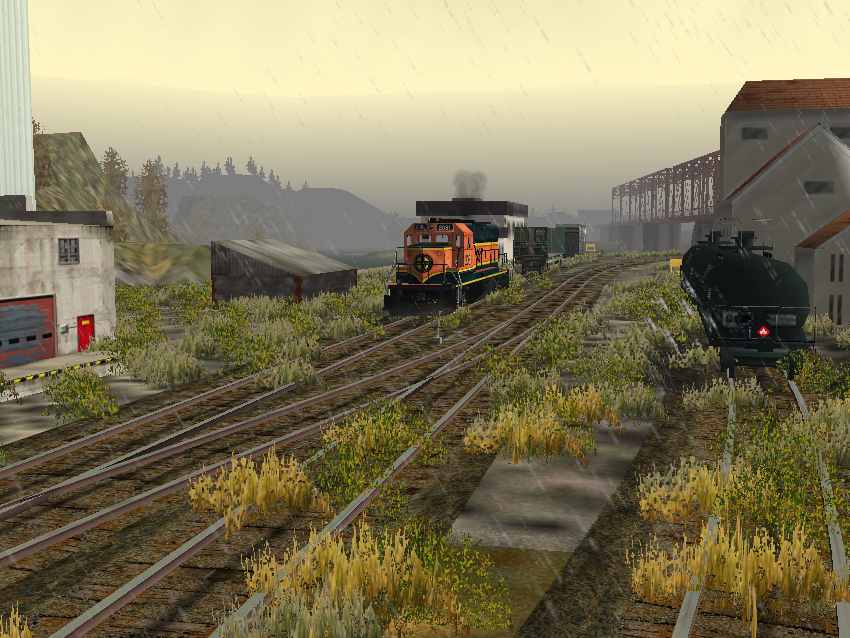
The big advantage is populating large areas with trees, since the shape is so simple, there's no complex lighting & geometry calculations. And it don't matter if there's one or 1000, since they're all the same shape and texture the graphics hardware runs thru the math very quickly, and treats them all as a single object for the lighting and viewing angle calculations. Framerates, baby.

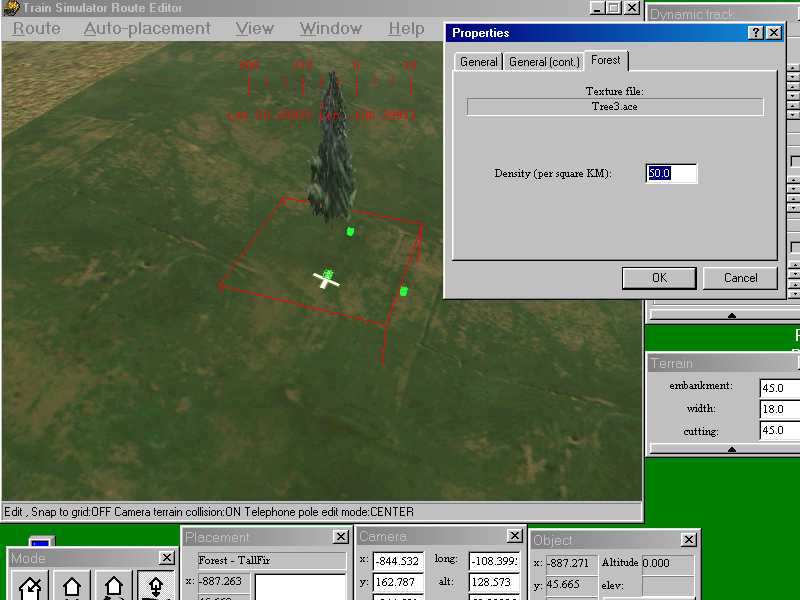
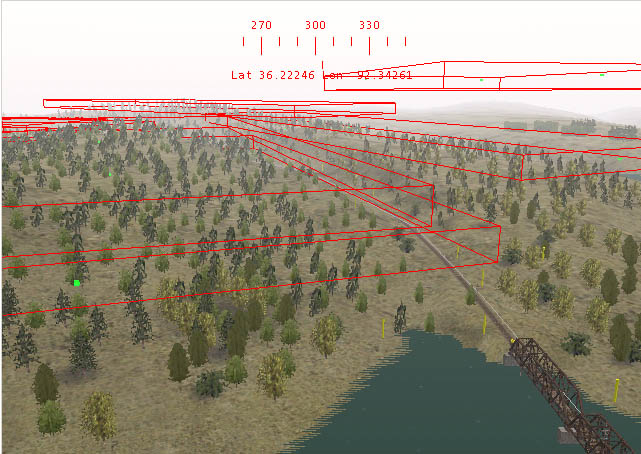
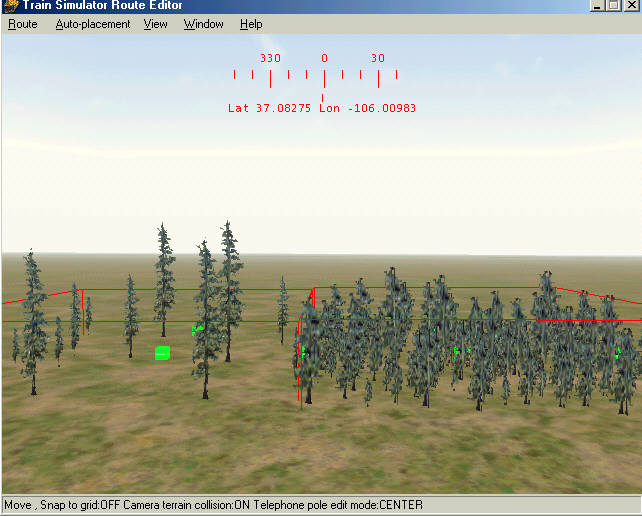
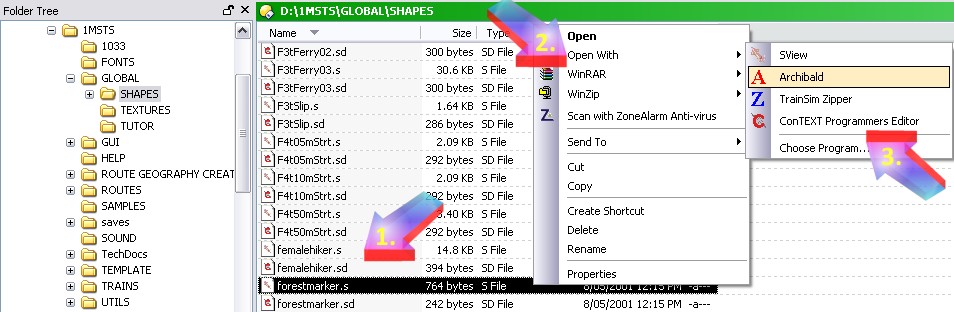
So how to hack it? That's actually the simple part, open Forests.dat in wordpad. There is a number right under the header (32 in this one, circled in red), this is the total number of forest regions, and it has to match however many lines you have. I got up to 39 without errors in my latest, I don't know if there's a limit. Each line is one forest region object, and has six fields in it.

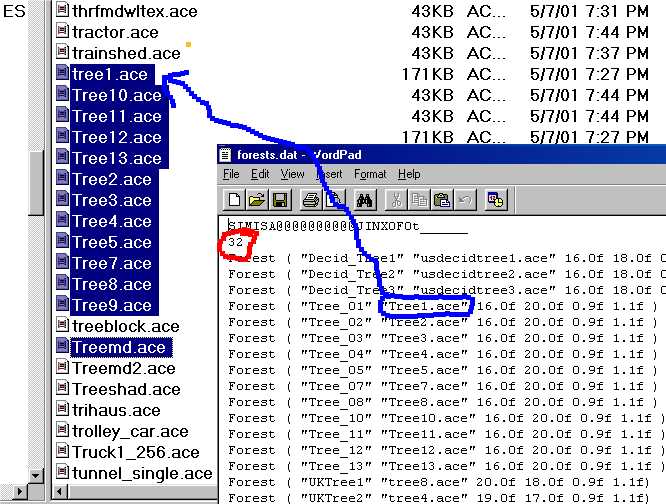
The first one, inside the quotes, "tree01", is the label that shows up in the object menu.  The second, "Tree1.ace", is the name of the ace file in \Textures that will be applied to the shape.
After that are 4 numbers. The first is overall width of the cross in meters, the second is height. The last two numbers are scaling multipliers, minimum and maximum scales for the objects. For these, if you want a tree 2 meters high and 1 meter wide, the first numbers would be 1.0f 2.0f. Making the last two numbers 1.0f 1.0f would give a uniform size, all the trees would be 2m high 1m wide. The defaults make them slightly different (0.9f 1.1f) for variety, if you made them 0.5f 2.0f, that would give a maximum multiplier of two and a minimum of one half, so the biggest tree in that region would be 4 meters high, the smallest would be one meter.

So let's get on with hacking this thing already, enough of the explanations. First I find a texture that strikes my fancy, like Jason's palm trees for example.

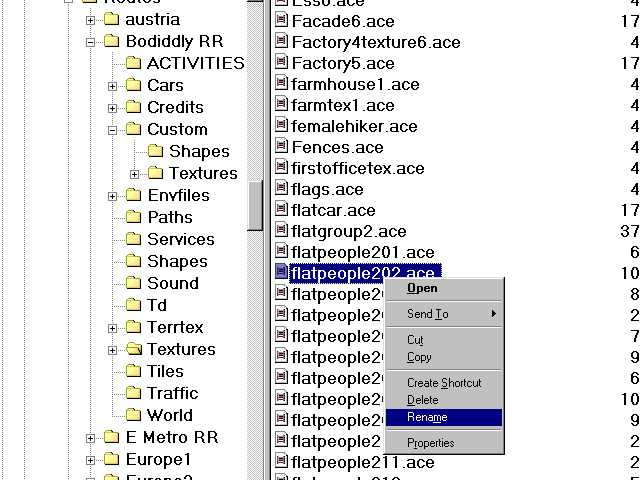
Hmm, no palm trees in this route, but flat people might texture OK, let's try it. Being a lazy SOB who don't like to type, I right click on the file, select "rename", and instead of renaming it, I just hit CTRL-C. That copies the filename to the clipboard so I don't make a mis\*.*\take when I type it.

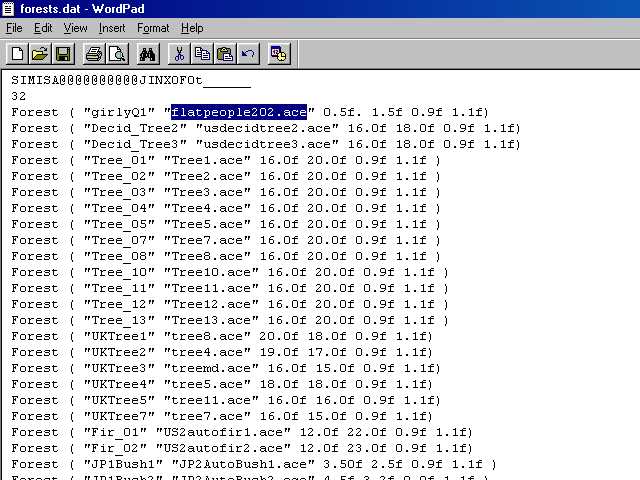
I type whatever I'm gonna call this new thing between the quotation marks to replace the original label, then I click-drag to highlight their usdecidtree1.ace, and hit CTRL-V to paste in the name of the ace file. You can type it instead, just make sure you spell it right. Since these are humanoids of the female persuasion, I make them half a meter wide and 1 1/2 meters high. I don't have a pic of Darrel Hannah, so I'm not doing an "attack of the 50 foot woman" here.

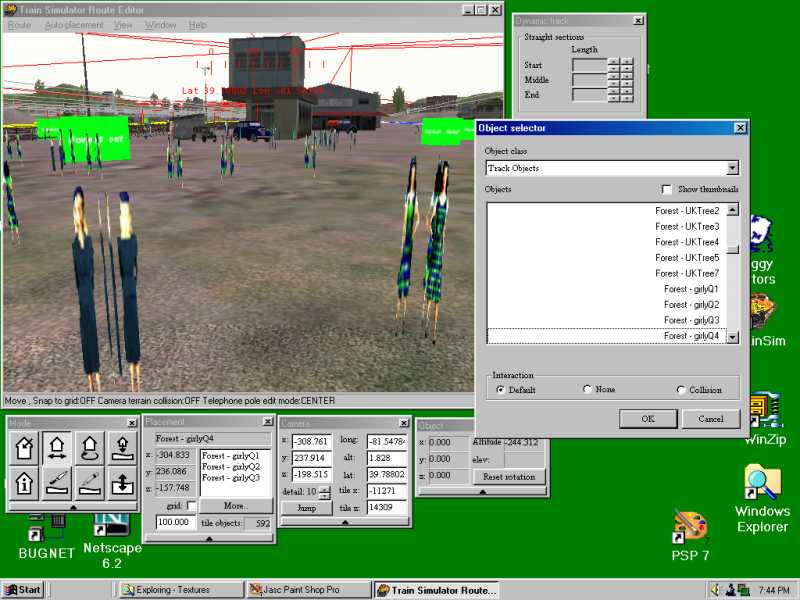
Hmm. Looks pretty bad, some experimenting is necessary to see what textures are suitable for this thing. It will apply whatever ace you choose to all four sides of the cross, and the transparency will be applied to each side as well.

Well I'll be a two-headed cow!

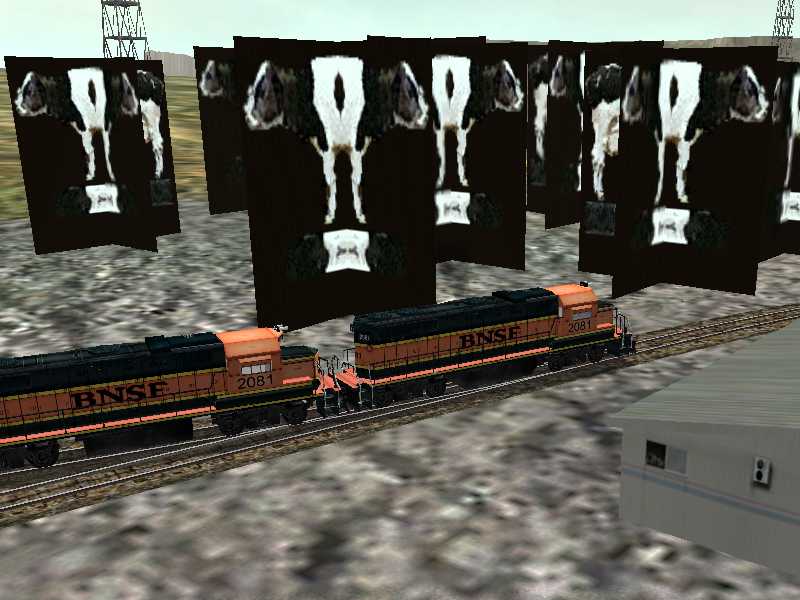
Animal, vegetable or mineral, if you're gonna use it as a forest region object you gotta pretend it's a vegetable and copy the main ace file to all the \textures subfolders except \night if they ain't already in there.

So just to clear up the cow-nfusion, think of a forest region as a shape, with the .S file being scaleable, and instead of calling for a specific .ACE file, it will accept whatever ace file names you put in the FORESTS.DAT file. It has a top-secret hidden mystery .SD file that calls for extended shape data of "all seasons", and since you can't find it to edit it, you gotta have whatever .ACE file you use in all the seasonal folders.


Placing Your Forest

Replacing the forests.dat file with this one (click here) won't hurt anything already in the route, since the info for the ones you already placed are written to the \World\*.w files.

Placing the object, it has 3 little green boxes, the center one is for the actual object selection, right clicking gives you the properties window. It defaults to 50 trees per square km, which ain't much of a forest. The little green boxes at the edges are the handles, click on one of those and select the move icon, then you can drag the handles to shape it.

I usually hit W for wireframe mode since if you do this on a hillside the handles tend to get buried. Click on a handle, then zoom out so you can see what you're doing, stretch it out, zoom back in, click on the other handle, zoom back out and stretch the other side, position the whole mess. Too bad it's rectangular, gotta adjust that for curves.

Once I got it positioned, I select the center green box again, right click, and just type 9999, it will fall back to whatever the max is. These guys say it's 5000, I dunno, I never looked.

Place a few of my JP2bush1large regions along with the trees, it don't look half bad.


Increasing Forest Density

Forests in the west can be pretty thick! I wanted to see how far I could go and still run decently. There are 6 overlapping forests on each side of the track, mostly trees, but some stumps too. I set each at a density of 5000.

From the rear of a caboose, I dropped from 26 to 20fps. with the steam engine and several cars in the view, from 22 to 15-17fps. Not too bad for a really thick forest of various trees!

Overlapping forest regions can also be done to add variety in tree species. However, overlapping two or three dense forest objects can be difficult to manipulate, if you need to make changes. All those green diamonds tend to get confusing.  Consider placing the forests at different heights. The trees will still conform to the terrain, but the green blocks will be up (or down) in relation to the red borders (Fred Huntley).

It doesn't do any good to keep increasing the forest density value because there is a minimum distance between trees.  The limitation is the pattern and spaces between.

Here's one of my old experiments using overlapping weed regions, what I found was that the smaller the object, the smaller the spaces in between, and the more densely they will pack in a single forest region. While editing the textures, I screwed up and forgot the alpha channel once, and this pic gives an idea of what the actual object looks like:

Essentially you can type in wierd numbers like 999999, but they will revert to whatever the maximum density is for the width of the individual object. Timken discovered that with his fir trees, the image was real skinny and the transparent edges were real wide, so even at max density the apparent spaces between the trees were real wide. After fattening up the image so that it extended to the edges of the ace file, thus,

he found that he was able to pack them in tighter (remember you can change their width/height parameters in the forests.dat).

Again, there are other limits to that, not only does it eat framerates like crazy, it also causes the route editor to crash more frequently than usual.

Changes to the forest.dat values will not change forests already placed (the info for the ones you already placed are written to the \World\*.w files) so you can experiment without messing up what you have already done.    You can change the size of forests manually in the world file with a quick search and replace using something simple as ConTEXT, without going to all the trouble of removing them and planting more. Also (with a backup of course) you can play around with it and see what looks the best.

Here's another idea: You can put a regular grass texture in all the folders except spring, put the grass texture as poppies in spring, and make a forest object out of it, something like this:

Forest ( "Poppies" "poppies.ace" 0.1f 0.2f 0.9f 1.1f)

That would give you a tenth of meter (about 3 1/2 inches) wide, two tenths of a meter (about 7 inches) high. If it ain't dense enough you could use overlapping regions. Putting the regular texture in all the folders except spring and night (don't need a night texture for a forest region, I did check that!), with the blooming poppies in spring, would give you the effect you're looking for.


Increasing Forest Visibility beyond 1000m

In the image below, presented courtesy of Sean Kelly, there are forests in the middle of the loop, but they aren't visible, because they are beyond 1000 meters. But the normal trees are visible beyond this area on the far side of the loop, beyond 1000 meters.

Forests appear/disappear suddenly when the camera (eye point in the sim) is 1,000m from the centre-point of the forest.

The reason for the "pop-up" into view is that the simulation measures the distance-to-the-forest from the camera to the forest center point (the central green box), not the nearest edge of the forest. Many route builders have drawn out a forest rectangle that has a long side run parallel to the track path: this is a sure-fire way to have trees jump up in your face.

For example, the maximum length of a forest is 1.1km (550m out each side of the centre-point) and you've placed it parallel to the track, the forest will pop-up when when the edge of the forest is only 450m away. Examine the two images below: the first image shows vehicle (UFO) parked 990m from centre of forest; the camera is outside the 1000m mark and no forest is visible. Simply moving the camera in 5m (not the vehicle) and the forest pops up, the edge only 450m away:


A much better method of forest placement is to use a series of long, narrow forests that have the long side run perpendicular to the track path. Another valid option for route builders remains to rather place several small forest regions in sequence than one huge region. That also allows for some variety of tree types.

MSTS-Bin (version 1.8.05 or higher) now permits setting the forest viewing range to the maximum 2000m, but be aware that it doesn't stop the sim from starting to fade out the landscape before 2000m.

You will need to modify one file in your Global Shapes folder. You can use TkUtils' ZIPPER then ConTEXT, or simply open the compressed forestmarker.s file using Archibald (Archibald, Zipper and Mapper are part of TkUtils, downloadable from the steam4me home page). The following images show the way:

  1. Right-click on forestmarker.s in your Global Shapes folder;
  2. Click on "Open With" and then
  3. click on "Archibald" (alternatively you can uncompress the .S file with Zipper, then open with ConTEXT);

  4.  

  5. Scroll down to "lod_controls", click on the box to expand option tree until you get to distance_level_header. Click on "dlevel_selection: 1000" and change the 1000 to 2000 (but see comment below). Then click on the "Save" icon (top row, second from left).

  6. Alternatively, if you uncompress the file with Zipper, open it in ConTEXT, scroll down to line 77 and change 1000 to 2000, save and re-compress (editing with Archibald eliminates the need to un- or re-compress an .S file). See below:


The forests are now in view all the way out to 2000m but be aware that it doesn't stop the sim from starting to fade out the landscape well before 2000m - which means you can have forests hanging in free air as the hillsides they sit on fade away into nothingness.

By all means, get MSTS-Bin and make the change to the forest shape, but it's worth your while to fiddle and test what distance value works best for each route.