Adding lights to MSTS Rolling Stock


by Yuri Sos

Overview

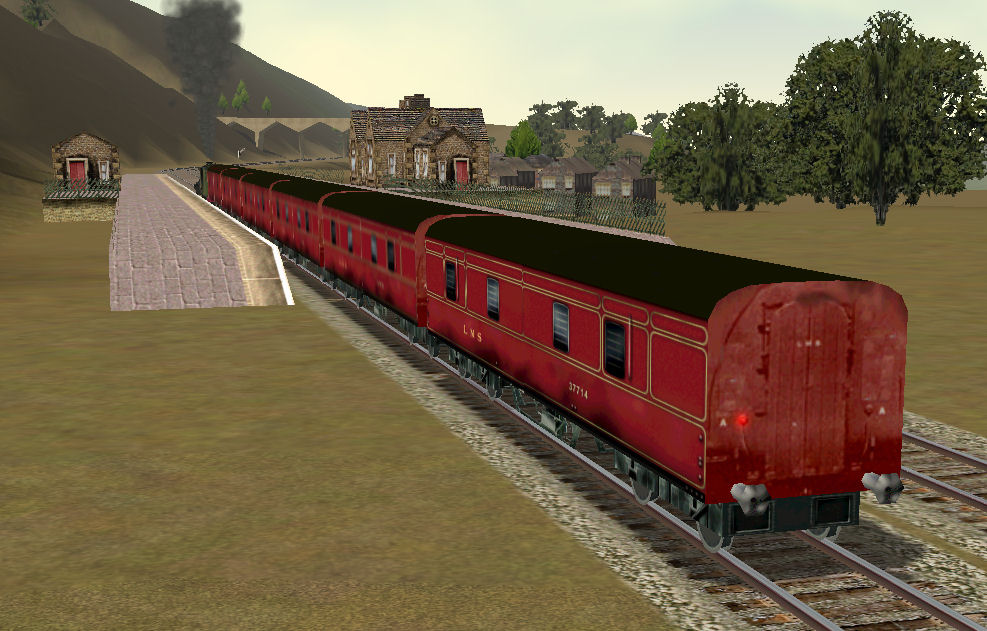
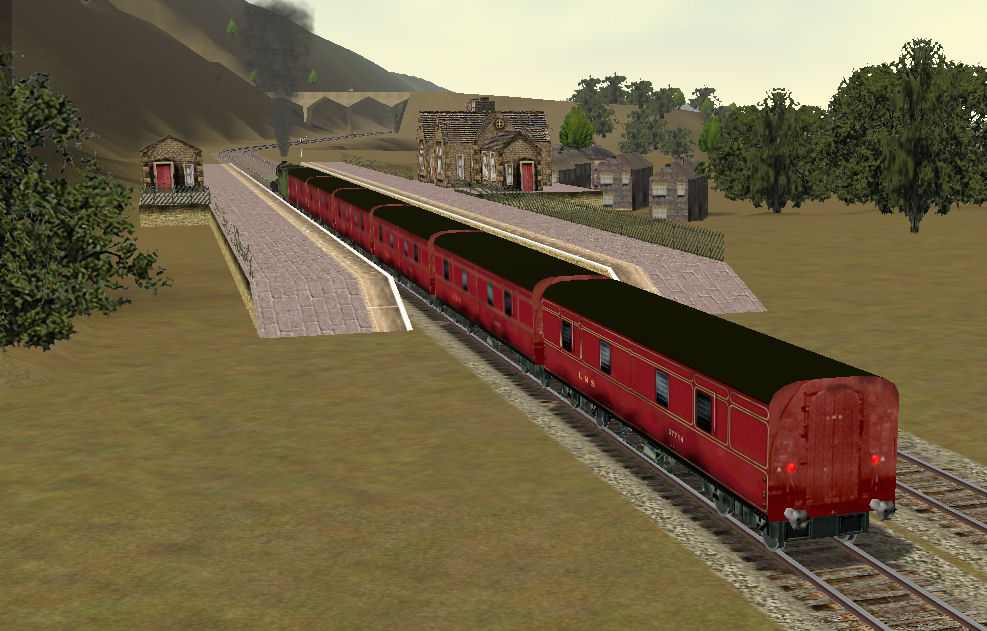
As you expand your stock of vehicles, it becomes time to add marker lights or tail lights to your vehicles even if they didn't come with them. In this tutorial, I'm going to show you how to add lights to any of your rolling stock that will light up no matter whether it's a payer or AI train.

I'm going to show you how to activate or install lighting in passenger and freight rolling stock.


Recommended Software

  • MSTS Shape Viewer (opens in new window); and
  • Positioning Tool (opens in new window).
  • ConTEXT editor (and preferably its highlighter tool as well) (opens in new window).
  • Follow the links above to install these and we can get started.


    Associating MSTS Files

    If you haven't already done this, "associate" .ENG and .WAG files with a text editor: this means that whenever you double-click on a file with the extension .ENG or .WAG, it will open with that editor.

    If you need to do this, click here for a new window/tab showing you how to do this using my favourite text editor, ConTEXT.

    And now to the part you came here for! ..........


    Acquiring the Numbers for the Light's Position

    The first step is to work out exactly where the light should be placed. Fortunately Shape Viewer (SV) and the Positioning Tool (PT) make it easy to acquire the necessary dimensions - in fact you'll find it's probably quicker to do than it is to read how to do it .

    I'll use the default Scotsman Mail car as my example vehicle.

    • Browse to the Scotsman folder and right-click on scotsmailcar.wag.
      Click on Sview.exe and the carriage will open in SV.

    • In SV, press F3 and browse to folder containing 1PosTool.
      You will see a "no match" message.
      From the drop-down box to the right of the filename, select MSTS .s file (*.s).


      lick on Postool.s to open it.

    • The PT will appear under the carriage (at the origin of the original shape) and may be hard to see. The adjustment panel allows you to move the PT shape: click on the open section between arrow and slider to advance by 1m, click on the arrows to move PT by 0.01m.

      It'll only take you a few seconds to move the PT to the end of the carriage (which is on right side of screen). Click Front/Rear to the left (increasing the negative value meaning it's moving to the rear) and Up/Down a couple of times to move it up towards its approximate height.

      Once the PT is clear of the rear of the carriage, select Tools | Camera | Rear to turn the carriage end on.

    • Click Tools | Orthogonal Projection. This removes perspective and will give you accurate placement of the PT.

    • Now use the Up/Down and Left/Right sliders to move the PT over the marker light graphic (or what I think is the marker light graphic). DO NOT MOVE the Front/Rear slider yet.
      You now have the x and y co-ordinates for the marker light: in this example x = -0.93 and y = 2.06.

    • Click Tools | Orthogonal Projection.
      The PT looks to have moved - it hasn't! Trust me!
      Do not touch the the Up/Down and Left/Right sliders.

    • Now move the Front/Rear slider forward (ie to the right) one arrow-click at a timeuntil the PT just disappears. Here it's disappeared at -8.69m, only the tips of the vane of the PT are visible.

    • One arrow-click (0.01m) back (left) and the PT appears. You know you have the right position when you see the PT appear/disappear with just one click of the slider: see image below and compare the difference between -8.69m (above) and -8.7m.
      You now have the exact z co-ordinate (z = -8.7).

    • Have a look at the side view - you can see the PT snug against the end of the carriage.

    • So these are the co-ordinates you need: -0.93 2.06 -8.7
      As I said above, much easier to do than to explain.
      Now to place them in the .WAG file.


    Inserting the Code into your .WAG file

    At the end of this tutorial are three blocks of code that will take cae of positioning the marker light(s). Using ConTEXT or similar ediitor open the .WAG file and scroll to the bottom. Copy the required block of code (do include the top and bottom comment lines as you won't misplace a bracket.

    Insert a blank line IMMEDIATELY BEFORE the very last bracket in the .WAG file then paste in the block of code. Move to the line
    Position ( n.nn n.nn -n.nn # x y z = left-/right+ up+/down- forward+/backward- all from model origin )
    and, using the figure we obtained above, change the line to read
    Position ( -0.93 2.06 -8.7 # x y z = left-/right+ up+/down- forward+/backward- all from model origin )

    You also will need to change radius to something like
    Radius ( 0.25 # diameter of light in meters)

    .


    Conclusion

    And here's the final result:

    If you want two marker lights, it's usually just a metter of using the 2-marker light code below and inserting the position figures into both lighting parameters, but make one of the "x" values positive (eg 0.93 in our ongoing example here), the other negative (ie -0.93). This will give you two marker lights equidistant from the centre of the rear of the carriage..... like this:


    Appendix: Blocks of Code For Marker Light(s) and EOT Devices

    Shown below are three blocks of code, the first for a single red light, the second for a pair of marker lights and the third for a flashing rear red light. You will only need to enter the figures for position of the light(s) and its size (diameter); the rest of the code is already set up for you.

    SINGLE STEADY LIGHT


    comment ( ===== lighting for last unit in train single steady light ========)
        Lights    (    1
    
            Light    (
                comment( single solid Rear red light )
                Type        ( 0 )
                Conditions    (
                    Service  ( 2 # in service player or AI, not inert in siding )
                        Unit ( 3 # last unit in train )
                )
                FadeIn    ( 0.5 )
                FadeOut   ( 0.5 )
                Cycle     ( 0 )
                States    ( 1
                    State   (
                        Duration    ( 0.0 )
                        LightColour ( ffff0000 # red colour ff for full bright, 80 for half bright )
                        Position    ( n.nn n.nn -n.nn #  x y z = left-/right+  up+/down- forward+/backward- all from model origin )
                        Azimuth    ( 180 180 180 # 180 degrees points backwards)
                        Transition ( 0 )
                        Radius     ( 0.nn # diameter of light in meters)
                    )
                )
            )
        )
    
    comment ( ====== end lighting code ====)


    TWIN Marker Lights


    comment ( ===== lighting for last unit in train twin  steady lights ========)
        Lights    (    2
    
            Light    (
                comment( single solid Rear red light left side)
                Type        ( 0 )
                Conditions    (
                    Service  ( 2 # in service player or AI, not inert in siding )
                        Unit ( 3 # last unit in train )
                )
                FadeIn    ( 0.5 )
                FadeOut   ( 0.5 )
                Cycle     ( 0 )
                States    ( 1
                    State   (
                        Duration    ( 0.0 )
                        LightColour ( ffff0000 # red colour ff for full bright, 80 for half bright )
                        Position    ( -n.nn n.nn -n.nn #  x y z = left-  up+/down- forward+/backward- all from model origin )
                        Azimuth    ( 180 180 180 # 180 degrees points backwards)
                        Transition ( 0 )
                        Radius     ( 0.nn # diameter of light in meters)
                    )
                )
            )
    Light    (
                comment( single solid Rear red light right side)
                Type        ( 0 )
                Conditions    (
                    Service  ( 2 # in service player or AI, not inert in siding )
                        Unit ( 3 # last unit in train )
                )
                FadeIn    ( 0.5 )
                FadeOut   ( 0.5 )
                Cycle     ( 0 )
                States    ( 1
                    State   (
                        Duration    ( 0.0 )
                        LightColour ( ffff0000 # red colour ff for full bright, 80 for half bright )
                        Position    ( n.nn n.nn -n.nn #  x y z = right+  up+/down- forward+/backward- all from model origin )
                        Azimuth    ( 180 180 180 # 180 degrees points backwards)
                        Transition ( 0 )
                        Radius     ( 0.nn # diameter of light in meters)
                    )
                )
            )
        )
    
    comment ( ====== end lighting code ====)


    SINGLE FLASHING LIGHT


    comment ( ===== lighting for last unit in train single flashing light ========)
        Lights    (    1
    
            Light    (
                comment( single flashing Rear red light )
                Type        ( 0 )
                Conditions    (
                    Service  ( 2 # in service player or AI, not inert in siding )
                        Unit ( 3 # last unit in train )
                )
                FadeIn    ( 0.5 )
                FadeOut   ( 0.5 )
                Cycle     ( 0 )
                States    ( 2
                    State   (
                        Duration    ( 0.35 )
                        LightColour ( ffff0000 # red colour ff for full bright, 80 for half bright )
                        Position    ( n.nn n.nn -n.nn #  x y z = left-/right+  up+/down- forward+/backward- all from model origin )
                        Azimuth    ( 180 180 180 # 180 degrees points backwards)
                        Transition ( 0 )
                        Radius     ( 0.nn # diameter of light in meters)
                    )
                    State   (
                        Duration    ( 0.35 )
                        LightColour ( 00000000 # light is off )
                        Position    ( n.nn n.nn -n.nn #  x y z = left-/right+  up+/down- forward+/backward- all from model origin )
                        Azimuth    ( 180 180 180 # 180 degrees points backwards)
                        Transition ( 0 )
                        Radius     ( 0.75 # diameter of light in meters)
                    )
                )
            )
        )
    
    comment ( ====== end lighting code ====)