Under operating conditions, colors can change due to stains dust and grime as well as bleaching from the sun. For weathering and shading purposes you want to get an accurate representation of these colors. To do this you need a fairly good photo of the subject. Ideally, a midday shot under a clear sunny sky.
To get your colors, you need the "color picker" tool in your graphics application. The color picker tool should come in two flavors. One that can pick up the color from a single pixel and another that can grab an average color by sampling an area. You will want to use the second tool if that is available to you. What you want is a sample of the average of the dark tones and an average of the light tones for all the colors that you will be wanting to use.
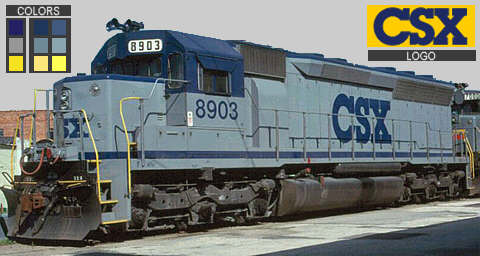
In the example in the illustration above, are three columns of colors on the top left. The first column are "clean" colors taken off the chart on the 3Dtrains.com site. The next columns are the averaged dark tones and the averaged light tones from the photograph. The blue and yellow are very close to the clean colors, but the gray on the prototype has a strong hint of blue in it (other photos of this livery from other sources shows that this is accurate).
We now have the colors that we need and we can finally proceed with the task of repainting the SD45. Make a color "swatch" as I have done below and save this in BMP format so that you have a reference to draw from for the duration of the project. This way every time you need the colors you can pick them from the "swatch" with the standard color picker without having to resample. This helps ensure color consistency throughout your project.

[ Top of Page ] [ Prev ] [ Next ]
Copyrights © 2004-2007, Sean Lim. All Rights Reserved. Hosted courtesy of steam4me with permission.