Well drawn details adds an enormous amount of visual character to the finished model. A well shaped 3D model will look poorly if it is textured and detailed badly. On the otherhand, an average model could become spectacular if given a properly rendered texture map set.
This section is about drawing details, specifically how I did some of the details on CSX 8903. Almost everything on my version of James' model has been given a complete work over.
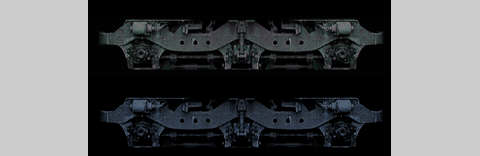
We did say that on my version of CSX #8903 that the underchassis would be CSX Blue. Many repainters do not repaint the bogies to match the colors of the other underchassis components. This is probably because bogies are hard to draw and often times modelers would use a suitable photographs as the basis of the bogie texture. This makes it hard to change, but it is editable if you have a graphics application that allows you to modify the existing colors on an image.
In the illustration above, the top image is the original bogie, and the lower image is the CSX Blue version. Using only a shift in hues, it took about a minute to do.

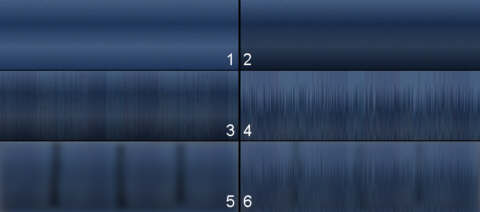
The roof fans looked faint on the original model so it is worth while enhancing. It is a two step process:
- The first image (left) is the original.
- It was sharpened (middle).
- Then it was darkened (right).

- Gradient fill with light tone uppermost.
- The entire image was textured bumped using a photo of a rusty metal surface. The process here is to overlay the original with a nearly transparent image of the rusted metal. Only visible enough to make a slight difference.
- A copy of the entire image is then given a "wind blast" treatment and fixed back at 75% transparency.
- Using the gradient tool, highlights and grime was added for the finishing touches.
- Base coat using the gradient tools in bands.
- Deep shadows added to lower surface with the gradient tool.
- Texture bumped using an image of a corrugated metal roof. As with the snow plow, the image is applied nearly transparent.
- A copy of the image is given the "wind blast" treatment.
- Another copy gets a few strokes of the trusty airbrush loaded with black. The colors on the whole image is then blended using a gaussian blur.
- All the layers are then flattened.

Drawing grills is easy. The first few steps should be self-explanatory (left to right, the first image is the original). To achieve the final finished effect the image was put through Picture Publisher's Lighting Studio.
[ Top of Page ] [ Prev ] [ Next ]
Copyrights © 2004-2007, Sean Lim. All Rights Reserved. Hosted courtesy of steam4me with permission.